Playstation 3 slim firmware. How to flash Sony PS3 - kmeaw firmware or updating the console manually. Why do you need PS3 firmware?
“Jailbreak”, which implies changing/unlocking the software part, is essentially the firmware of the set-top box.
After this process, games downloaded on the Internet without a licensed disc will be launched from the console, and various programs can be installed that were written by programming masters for more convenient use of the console.
The cost of such an operation with Playstation 3 is on average about 900 rubles.
Is it worth flashing the console?
First you should weigh all the pros and cons.
After unlocking, the following options will appear:
- record into the built-in memory of the console of games downloaded from the Internet (sent using a USB drive or via the ftp protocol) or unpacked from licensed discs;
- launching games directly from USB drives;
- usage homebrew– various unofficial software.
Accordingly, the user receives the following benefits:
- absence spending on games, saving;
- absence loads to a reading drive (there will be no need for it);
- extension console capabilities.
The number of advantages is not large, but each of them is a compelling argument in favor of performing this operation.
However, there is a minus:
- risk of getting banned. There is such a service as PSN. It is used on most Sony consoles and using this service, not licensed versions games. To avoid a ban, you need to play only licensed versions of games, or use homebrew programs to access the network.
Even if the console not connected to the network, you can still get banned, which will result in a lack of multiplayer. It's also worth noting that not all PS3s can be flashed.
How to find out the installed version
To check the version:
How to check if Sony PlayStation 3 firmware is possible
Supported Models:

Slim 2xxx - models with DATE CODE 1A or 1B need check this way:
- remove dump;
- download PS3DumpChecker;
- run, press Check Image, select dump file;
- find the variable “metldr.name”;
- clarify the value of “Actual data”. If it corresponds to the value: 6D 65 74 6C 64 72 00 00 00 00 00 00 00 00 00 00 – firmware is possible. If the number 32 comes after the number 72, it is impossible.
Update methods
Before installing the firmware on Sony PlayStation 3, you must remove the disk Blu-Ray from the drive, since the Playstation updates from the disc first.
WITH USB flash drives:
- Rename uploaded file to “PS3UPDAT.PUP” (in capital letters).
- Copy file PS3UPDAT.PUP to a USB drive (FAT32), having previously created two folders: “PS3”, and in it “UPDATE”.
- Insert USB drive into the console, then turn it on.
- Select “System update”, then “”. Flash PS3 following the instructions.
C using recovery. The method is identical to the previous one. You should also create two folders and copy the renamed firmware file. Further:

Through the Internet. When choosing this method, the set-top box will automatically update to the latest firmware version by downloading it from the Internet. If you need to install version 3.55, it is better not to use this method.
Which firmware to choose
It is impossible to say unequivocally which firmware is better. It all depends on the user's preferences. The most popular are:
- CFW Ferrox. Ferrox is suitable for those who like customization without unnecessary features.
- CFW Rebug. A special feature of the firmware is the presence useful functions, such as “PACKAGE MANAGER”, “REBUG TOOLBOX”, “SELECTOR” and several utilities.
Update to version 3.55
If the console you are using runs on a firmware version lower than 3.55 (for example, 3.41), it must be updated:
- you need to download OFW 3.55.
- format USB drive in FAT32 and create a folder “PS3”, and in it “UPDATE”. You need to copy the firmware into it. Both names must be entered in upper case, in capital letters.
- Next, insert the drive into the USB connector, then go to the “Settings” menu - “” and select “From media”. The update will be installed automatically. During this process, you should not touch, much less turn off the console.
Firmware procedure
Attention! Updating to custom firmware PS3 Fat, Slim and SuperSlim must be done only from version 3.55!
Should download necessary files for update. You can do this using the link on the 4pda forum. 


Creating a firmware file
In some cases, firmware manufacturers may make it available for download. archive with firmware, instead of the finished file in “PUP” format. In this case, you need to create such a file.
It is important to know— if the developer did not include instructions for assembling the *.PUP file along with the files, then it is better not to use it and download a ready-made one from another source.
Installing the multiMAN manager
Manager capabilities:
- FTP server , which operates constantly;
- file manager;
- setting additional features in the options.ini file (options_default.ini);
- launching games with problems using “+”;
- support 7 device types: HDD/USB/BD/SDHC/MS/CF;
- opportunity control the console using PSP and other devices;
- the ability to manage a manager with keyboards and mice;
- checking and updating at the click of a button;
- support COVER covers;
- support design themes;
- opportunity activate AVCHD with USB devices;
- possibility of creating backup copy AVCHD to internal HDD;
- support for playing AVCHD and BDVM content from the internal HDD;
- playback MP3 and JPEG viewing over the network;
- ability to work with devices formatted in NTFS.
Installation instructions:
- download multiMAN;
- take advantage of " Install PKG Files» (install package files) for installation. Just run the installer on the console and follow the wizard’s instructions.
How to run the game on a flashed PS3
To start you need:
- decide on the drive from which to launch. Make sure it is formatted as Fat32;
- create a folder on the drive “ GAMES”;
- copy games downloaded into it. Game names must be on English language;
- after the game has been copied, remove the flash drive and insert it into the console;
- after launching Multiman it should all games will be displayed from a flash drive. If the list of games is not loaded, press SELECT+L at the same time.
Rollback to version 3.55
Downgrade is a return to more old version official console firmware. This operation is needed to install custom firmware (if the version is higher than 3.55), and managers, such as Multiman or Rodgero Manager. They allow you to launch games downloaded from the Internet, without using licensed discs, directly from the built-in or portable storage device.
When rolling back, only the software part is affected, but in the process E3 programmer required– a device-chip that is connected inside the console during the procedure itself and then removed.
There are two ways to do a rollback:
- Buy a programmer, do a rollback following the instructions from the Internet (risky method).
- Take advantage with the help of specialists, which will not only perform a rollback, but will also install stable firmware and provide a guarantee of performance. The cost of these services is approximately equal to the cost of an E3 flasher. (recommended method).
Which option to use is a matter of taste.
Conditions under which a PS3 downgrade is possible:
- must be below 1B (for example, 9D and 0C), and the prefix must also have memory typeNOR;
- native console firmware should be below version 3.60;
- On PS3 Slim consoles with model number 3000, rollback is not possible.
Already now, Sony PS3 owners are rejoicing with delight, because now you can completely simply and quickly flash your game console and freely download and install games. Today, we will introduce you to the step-by-step actions of PS3 firmware.
First, a little theory.
Jailbreak or simply firmware is changing/unlocking the software shell of your console. After flashing the firmware, your game console will be able to run games downloaded from the Internet without having a license disk, as well as install various applications, written by craftsmen for ease of use of the console.
Firmware history:
On December 29, 2010, a security flaw was found in the PS3.
On January 9, 2011, George Hotz (Geohot) released the first custom firmware of its kind for the PS3, which made it possible to run any software on a curling iron.
On January 17, 3.55 Waninkoko CFW was created and posted on the network
On January 18, 3.55 Wutangrza CFW was created and posted online
On January 19, 3.55 Kmeaw CFW was created and posted online
On January 27, the official 3.56 firmware was released
On January 29, 3.55 Waninkoko CFW version 2 was created and posted online
What you need to flash the console firmware:
1. Set-top box with firmware no higher than 3.55 (see below how you can check the firmware version of your console)
2. Flash drive formatted in file system FAT32
4. A little patience and attentiveness :)
How to check your firmware version?
Everything is very simple. To do this, follow these steps: Turn on the console and go to the menu “ Settings" — "System" — "System Information"- here your firmware version will be visible (example: 3.41, 3.55, etc.).
ATTENTION! To flash the set-top box, you must have official firmware 3.55 installed.
Firmware update methods.
There are 3 ways to update the firmware, let's look at each of them.
A) From a flash drive. Download the firmware. Next, create the “PS3” folder on the flash drive and the “UPDATE” folder in it (the names of both folders must be written in capital letters) and throw the downloaded firmware there.
ATTENTION! The firmware should be located approximately in the following path: H:/PS3/UPDATE/PS3UPDAT.PUP
b) From a flash drive, through the Recovery menu. To begin with, we prepare flash drives with firmware according to the instructions above (see paragraph “ A)", update from flash drive). Turn off the console. Place your finger on the console's power button and hold it until the console turns on and off. We remove our finger and press the console power button again and wait until we hear a double “peep-peep” (during the process, the console will beep but with a large interval, you need to hold it until the double peak), after which we remove the finger. The console will ask you to connect the game controller using a wire, which is what we must do.
Select the item “Firmware update” (it’s the last one in the list) and wait for it to finish.
Video of the whole process:
c) Via the Internet from XMB. ATTENTION!With this method, the update will occur immediately on latest firmware and if you need 3.55, then do not use this method!
Selecting custom firmware
At this stage, you will need to decide what custom firmware you will install for yourself. At the moment there are 4 versions of different firmware.
I would like to note that the quality of each firmware sometimes differs greatly for each user, which is why your task is to choose the best option for your console!
ATTENTION! It is more reliable to flash the console in the recovery menu (see above for the method of getting into the recovery menu). Although many people are able to carry out the necessary operations via XMB without any problems.
1. CFW by kmeaw.
This firmware already has built-in lv2.pkg (there is no need to install it separately, but you will still have to run it every time). Accordingly, there are NO bricks.
Firmware installation:
- If you have GEOHOT, then you can put it on top of it, without OFW.
Video instructions for installing firmware from kmeaw.
2. CFW from Geohot.
This firmware was the first. There is no chance of getting a brick with her. Games run from internal hard drive, using a previously found and installed game pkg file. This method allows you to run games without a disc in the drive! In the latest versions of managers, it is now possible to run games without pkg and even from external drives!
Firmware installation:
- We update to the original firmware 3.55. (3 methods are described above)
- Download the firmware from Geohot - HERE. And we update the system from a flash drive.
3. CFW from Waninkoko.
The first firmware with support for file managers! It is also possible to launch games from an external hard drive.
But first, let’s look carefully at which revisions of consoles can be updated with firmware!
You can see the revision number of your console on the back (bottom) cover. ATTENTION! There may also be numbers after the revision number (for example, CECHH08 is the same CECHH).
NOT slim consoles:
They are being bricked
- CECHA = 256MB
- CECHB = 256MB
- CECHC = 256MB
- CECHE = 256MB
- CECHG = 256MB
- CECHH = 16MB
- CECHJ = 16MB
- CECHK = 16MB
- CECHL = 16MB
- CECHM = 16MB
- CECHP = 16MB
- CECHQ = 16MB
Slim version:
Successfully
- CECH-20..A = 16MB
- CECH-20..B = 16MB
- CECH-21..A = 16MB
- CECH-21..B = 16MB
- CECH-250.A = 16MB
- CECH-250.B = 16MB
- CECH-251.A = 16MB
- CECH-251.B = 16MB
Firmware installation:
- Install the original firmware 3.55 (OFW). If you have CFW 3.55, then we do this through the recovery mod.
- Download the firmware - HERE.
- We update via a USB flash drive via XMB.
4. CFW from Waninkoko version 2
New firmware version from VanyaKokos. This time they promise no bricks. Otherwise the firmware is quite stable! It seems to be based on Hermes. People respond extremely positively.
Firmware installation:
- Install the original firmware 3.55 (OFW). If you have CFW 3.55, then we do this through the recovery mod. Some of the users installed it directly on the first version through the recovery menu and everything works great!
- Download the finished firmware - HERE.
- We update the finished firmware from a flash drive via XMB
ATTENTION! If the console constantly displays a message stating that the firmware version is the latest, flash it through the recovery menu!
5. CFW by Wutangrza
Prosha on which, according to rumors, there are no bricks. In principle, for regular user, except 0% brick differences from "Waninkoko"- No. The only thing is that you will have to assemble the firmware yourself according to the manual (see below).
Firmware installation:
- Install the original firmware 3.55 (OFW). If you have CFW 3.55, then we do this through the recovery mod.
- Download the original firmware - HERE.
- Download the Wutangi patch - HERE.
- Download the program called: “bsdiff” - HERE.
- We write the original firmware, patch and downloaded program into one folder - (for example C:\cfw)
- Opening command line- Windows (press Win+R and type cmd) and go to the created folder (command: cd c:\cfw)
- Execute the following command - “bspatch PS3UPDAT.PUP CFW.PUP Wutangrza-3.55.patch”
- Rename the file “CFW.PUP” to “PS3UPDAT.PUP” and use it to update the set-top box from a flash drive via XMB
- Install the firmware from Geohot - “ CFW from Geohota» (we described it second)
- Download the package: lv2 - HERE. And install it
- Install the file manager you need
Error codes:
80010009 — Restore original EBOOT and SFO manually.
80029567 — This error occurs when the PKG is signed for a specific firmware, and not for the one you are installing on. Look for signed PKGs or install different firmware.
8002F997 — It is advisable to take another flash drive and format it to the FAT32 file system. Then repeat the operation.
8002B603 — It can be treated through recovery mod 4, item “Reconstruct database”
That's probably all. In the next article we will look at popular managers and working with them, a way to record games from FTP to HDD consoles, as well as a detailed FAQ on all sorts of minor issues. Good luck!
All about PlayStation 3 firmware
Instructions on how to update the game console software to version 3.55: Please note that there is only one version, but there are several important ones different types, each of which has its own pros, cons and implementation methods.
Interface language of programs for PlayStation 3 firmware: Russian, English - this is quite convenient, considering that until recently there was no Russian language.
Please pay attention to the fact that even after flashing the PlayStation 3 firmware, some games will require a disk in the drive, and without the disk nothing will work, the new software will not do a miracle, it will simply add to your comfort when using the console.
The process is quite simple, but you need to be extremely careful, since the slightest mistake can lead to irreversible consequences.
To flash the console, you only need a PlayStation 3, a computer with an Internet connection and the ability to use it, a flash drive or external hard drive, a brain and direct hands.*
*If the latter is absent, immediately throw your console out of the window, and then hit yourself against the wall. (It was a joke, but there is truth in it too. So be careful. Good luck!)
Where to start the firmware process?
1. Turn on the PlayStation 3 and see what firmware is currently installed on the console.
To do this, go to Settings/system settings/system information.
There you will see all the information about the set-top box, including the firmware version. If version installed firmware no higher than 3.55 – very good - PlayStation 3 will flash without problems.
2. Download the firmware and read the firmware instructions.
3. Copy the firmware files to a flash drive or external hard drive, according to the instructions, organize them into folders.
4. Connect a flash drive or hard drive to the console and install the required firmware, then launch necessary programs described in the firmware instructions.
5. Write the game to the flash drive, Backup Manager sees the games along the path “external drive/GAMES/game folder.”
6. Launch Backup Manager which is located in the “game” menu, then select the game, wait a little and launch.
7. Play and have fun.
Firmware and instructions for flashing PlayStation 3
Firmware for PS3: 3.55 Kmeaw
Advantages and disadvantages:
+ Easy to install
+ Works on all consoles
+ All functions of firmware 3.55 work
+ No need for PS Jailbreak (flash drive for hacking Sony PlayStation 3)
+ Backup managers work
+ Works PSN
Instructions for installing firmware 3.55 Kmeaw:
We install it like regular official firmware.
In addition, you must install all files from the folder with the firmware.
To run the game we use any Backup Manager.
Firmware for PS3: 3.55 Waninkoko
Advantages and disadvantages:
+ Easy to install
- If the instructions are not followed exactly, there is a possibility of ruining the PlayStation.
+ It is possible to revive the PlayStation after failure.
+ No need for PSJailbreak (device for hacking Sony PlayStation 3)
+ Backup Managers work
+ Works PSN
+ All functions of firmware 3.55 work
- Every time you load it is necessary to carry out manipulations before starting the game
- Information may be transferred to PSN, which, in the future, will lead to a ban on the console. (the disadvantage is eliminated by unplugging the Internet cable during the game)
Attention! You do not have permission to view hidden text.
Instructions for installing firmware 3.55 Waninkoko:
Installation is carried out in the same way as in regular official firmware.
You must install all files from the folder with the firmware.
You can use any Backup Manager to run the game.
We will also need to carry out some manipulations with the official firmware file version 3.55 - PS3UPDAT.PUP
You can download the official firmware file for PS3 version 3.55 - PS3UPDAT.PUP. Here
To do this, you will also need to download the Patch Waninkoko-CFW3.55_v2-Patch.exe.
Copy the patch Waninkoko-CFW3.55_v2-Patch.exe. and firmware PS3UPDAT.PUP into one folder, run the Patch, after a few seconds a console window will launch in which hints will appear (True in English. It is advisable to stock up on a dictionary, unless of course you speak English), you will first be reminded to copy the firmware file into one Patcher folder. And we already have it ready. Press the big "ENTER" key, then you will be asked to compare the MD5 check amount original file with the one specified in the patcher.
The MD5 of the original firmware file must be as follows:
If the amount matches, press “ENTER”, patching of the official firmware begins.
Then, you will be prompted to compare the MD5 check amount of the newly created custom firmware file.
Press "ENTER", wait for the MD5 to be generated and compare it with the one specified in the program.
The MD5 of the Waninkoko custom firmware must match this:
If everything is correct, then you have done the right thing and exactly what you need is the custom firmware file version 3.55 for PS3.
Press the "ENTER" key on your keyboard, you may have to press it several times until the window closes on its own.
Take from the patch and firmware folder the newly created ready-made firmware which will be called PS3UPDAT-Waninkoko_v2.PUP
Rename the resulting custom firmware as PS3UPDAT.PUP and write it to an external USB hard drive or flash drive in the folder PS3/UPDATE/
Insert the hard drive or flash drive into any USB port on the PlayStation 3 and install it through the “Settings -> System Update” menu. There, select "Update from storage media".
Note: The modified version of the firmware can be installed without problems on any PlayStation firmware version that is not higher than version 3.55.
If you cannot start the installation from XMB, then start the installation through Recovery mode.
Now the firmware is installed, and you can start installing applications on your game console.
Firmware for PS3: 3.55 PS3A
Advantages and disadvantages:
+ This CFW is more stable and functional than the popular Kmeaw 3.55 CFW.
+ Improved versions lv1 & lv2 Peek & Poke Patch for OtherOS
+ Changed user icons
+ Removed unnecessary Package Manager from CFW Rebug
+ Firmware includes BDEmu v2 and OpenFTP
+ Added HeavyRain theme
+ Added support for OtherOS
+ Protection 3.66 Spoof
- Spoof 3.66 protection is designed to prevent you from accidentally updating your PS3 to version 3.66!
This means that you will not be able to log into PSN and will not be able to play games for 3.66
Attention! You do not have permission to view hidden text.
Instructions for installing firmware 3.55 PS3A:
We install it in the same way as regular official firmware for Sony PlayStation 3.
It is also necessary to install all the files from the folder with the firmware.
To run games we use any Backup Manager.
Backup Managers:
Gaia Manager v2.07
This backup manager reads game images at dev_hdd0/GAMES/
Download
Installation instructions for Gaia Manager v2.07
Write the backup manager PKG file to the root directory of a flash drive or hard drive.
Insert this storage medium into any USB input consoles.
In the "Game / Install Package Files" menu, start installing the program...
Once the installation is complete, exit to the XMB menu and run the desired program from the "Game" menu.
multiMAN Manager v02.05.05
This latest version Backup Manager from multiMAN, which supports launching PS3 images (can work with “problem” games).
This backup manager can read .HEX and .MP3 formats, and also has a built-in file manager and FTP server. MultiMAN Manager can run the console in PS2 game image mode (only on playstation with backward compatibility!)
Main features of multiMAN Manager v02.05.05:
- multiMAN Manager has a built-in FTP server that is constantly active
- There is a file manager that allows you to work with all the contents of the PlayStation 3 and connected devices
- Additional settings in the options.ini file (or options_default.ini)
- Added Copy/Dump indicator
- Launching "problem" games using the SELECT+X keys
- During connection, 7 devices are supported and displayed (HDD/USB/BD/SDHC/MS/CF)
- Support remote control via PSP or other compatible devices
- MOVE supported
- In mode file manager Keyboard and mouse support is provided
- Animated icons and backgrounds
- Added check/download function
- Added update when pressing a button
- Added support for COVER.PNG in AVCHD video catalogs
- Support for themes
- Supports AVCHD activation from an external USB device.
- Support for AVCHD backup to internal HDD
- Supports AVCHD and BDVM video playback from internal HDD
- Support DLP and CRT TV rescanning
- MP3 format support (plays songs using File Manager, it is possible to play tracks over the network)
- You can view JPEG/PNG images both through the File manager and over the network
- Support for HEX files
- Supports 4 types of fonts (fonts can be changed by pressing the + button combination)
Setting background music in multiMAN Manager:
If you want to set your own background music in the manager, rename any mp3 file to SOUND.BIN and copy it to the /dev_hdd0/game/BLES80608/USRDIR/ directory on the PlayStation 3. After rebooting, your song will be played in the multiMAN Manager menu.
Attention! You do not have permission to view hidden text.
Installation instructions for multiMAN Manager:
Write the PKG file of the program to the root of a removable storage medium (flash drive or USB hard drive).
Insert the media with the recorded program into the USB input of the Sony PlayStation.
Through the menu "Game -> Install Package Files" start the installation of multiMAN Manager.
Once the installation is complete, exit to the XMB menu and you can launch the program from the "Game" menu.
Open Manager v1.17.2
Open Manager works perfectly with latest update Groove's firmware is "Hermes payload". With it, you can run most games without a disc with the game in the drive (and some games do not work at all without a disc).
It is allowed to change and modify the program, but please accompany it with the source code - the author requests.
Download: Download from depositfiles.com / Download from letitbit.net
File - "UP0001-OMAN46756_00-0000111122223333.pkg" - Open Backup Manager program
The file "OpenBM_1.17.2_SRC" contains the sources on the basis of which Open Backup Manager itself was compiled using the compiler "PS3 SDK v1.92-FuxSony"
Key features of Open Manager
The Open Manager program supports up to 512 different objects from the bluray drive of the internal hard drive and two USB devices.
Allows you to copy information from bdvd discs to a hdd0 hard drive or an external USB device, with USB storage device to hdd0 and vice versa, from hdd0 to a USB device. During operation, Open Manager asks you where to record data. It uses asynchronous write and read mode for faster copying.
Support for large files in FAT format has been implemented. When the size of one file exceeds 4GB, it is split into several parts, the size of which is less than 4GB, and each part is assigned its own serial number which is written in its own extension. The extension has the form *.666xx (for example, if the name of a file whose size is larger than 4gb is file.ext, then the file is split into parts file.ext.66600, file.ext.66601, and so on). Such files are not bootable; they are placed in a folder designated by the prefix "_" in its name. Files split into parts are subsequently merged into one file when you copy it to hdd0.
Open Manager independently searches for the path to the games directory, then notifies you where the game is located, and offers to leave the old directory dev_hdd0\game\LAUN12345\GAMEZ\ or create a new one.
It is possible to easily change folders by pressing the L2+START key combination.
The new directory with games is located at: dev_hdd0\game\OMAN46756\GAMEZ\
Options for checking games have been implemented (activated by pressing the L1 button). The menu displays information about files, file sizes, large files, and broken parts.
Homebrew support has been implemented: you can create a folder called "homebrew" in the root folder of the USB device and write folders with programs that contain the EBOOT.BIN and ICON0.PNG file there. It is also possible to use an internal hdd0 drive. Homebrew starts automatically and receives the path in argv (note to developers).
Implemented FTP server support for downloading homebrew. If necessary, you can enable FTP mode and transfer files from your computer. To do this, you need to set the following username in the FTP client: "OMAN46756".
In combination with Open Manager, I recommend using the FTP client "FlashFXP". You can download FlashFXP here
Instructions for using FlashFXP can be downloaded here.
For the vast majority of experienced owners of game consoles, the word “firmware” does not cause absolutely no reaction, because for them this is as familiar as the game itself on the console. Being a fairly common way to “pump up” a console, installing additional software gives many different privileges to those who take the risk.
Play Station firmware is the installation of special software that either corrects errors in the operation of the device or unlocks it for unlicensed content. Most often, official software replaced with a hacked one, or simply modified one.
Pros and cons of ps3 slim firmware
 Basically, when discussing the pros and quite significant disadvantages of installing firmware on the console, we are talking about unofficial software products, so you should remember that everything said below about the advantages and disadvantages is only true for custom firmware. In general, there are quite a few reasons to flash your console.
- Unofficial firmware opens the door to unlicensed games, as well as so-called homebrew programs. Homebrew is mostly unlicensed add-on software that is usually developed by enthusiasts. You can simply download games and programs of interest from the Internet, and they will be played on the console without any problems.
- With custom software, you can “transfer” programs and games from licensed media to the internal hard drive, after which no external drives will no longer be needed.
- A firmware Play Station 3 can also replace other consoles. That is, in order to play exclusive games for some consoles, you do not need to buy them. It is enough to install an emulator of other consoles on the firmware version of the console and you can play absolutely any games.
As a result, installing “custom” software on the console will save money in the future, significantly expand the gaming capabilities of the console, and also extend the life of the drive (after flashing the firmware, its use will become extremely rare).
The impressive advantages of the idea of flashing your Playstation 3 greatly balance the disadvantages of this solution. 
- Sony consoles support the PSN service, which allows you to network games. Built into the service special system DNAS, designed to track down unlicensed games online. If the system detects a pirated game, an immediate ban will follow. That is, if the purpose of buying a PS 3 is to play online, then firmware is not really an option. On the other hand, you can still install the firmware, but purchase licenses for online games, then you can avoid a ban. When using any unlicensed software, the set-top box must be disconnected from the network. And when you access the Internet, you need to turn off all pirated and homebrew programs, even if they work in background or is it just a file manager shell.
- Not every model can have firmware installed. Today, only official software no higher than version 3.55 can be upgraded. Of course, this rule can also be circumvented. To do this you will have to do a “downgrade”, which is a rather expensive procedure regarding the firmware. The fact is that the procedure for downgrading the software version (“downgrade”) requires the presence of an E3 flasher. At home, downgrading the software version is difficult and, moreover, unprofitable, since the cost of the programmer is much higher than the price of a “downgrade” in a workshop. And that is not all. Not all models can be downgraded. Sony found a way to protect later versions of consoles. Models that are 100% flashable are all PS thick boxes that were produced before July 2009. As for “slim” models, models up to 2010, as well as some versions of 2011, can be flashed. Supersim and Slim models, which were produced from the second half of 2011, are not subject to either firmware or downgrade. For them, only ODE (drive emulator) is suitable, which will provide some functionality of custom software.
You can find out whether your existing console can be updated with firmware by contacting any workshop. However, before this you need to find out the series of the console and when it was produced. The Playstation 3 Slim series code begins with CECH2*** or CECH3***. Instead of asterisks there will be a code indicating specific model consoles. The year and quarter in which the console was released is indicated by a specific DATA code, written in the 0A format, where the number 0 indicates the year the console was released (2010), and the letter A is the first quarter. Accordingly, if the console was released in the third quarter of 2012, then the console will say 2C. Experts, using the series code and release date of the console, will tell you whether it can be flashed, or whether you will have to be content with only ODE.
Do-it-yourself Playstation firmware
A large number of PS3 slim owners are interested in how to flash their console at home, and whether they can do it themselves. The answer is clear: if the console is one of those versions that are flashed, then you can flash it yourself. However, only those whose hands grow from the right place should sit down to this task, otherwise it may turn out that more money will be spent on restoring the console than on five firmware in the workshop.
To begin with, it’s worth touching on the topic of installing official firmware.
There are two installation methods: 
- Through the Internet. If you have an Internet connection, the new software is downloaded directly to the Playstation. To do this, you need to select “System Update” in “Settings”, where you click on “Network Update”. Using this method, the latest update will be installed.
- From external media. You need to download the software onto the flash drive from the official website playstation.com. For the entire operation to be successful, the media must be prepared. Before you start downloading the update to the flash drive, you need to create a PS3 directory on it, and in it the UPDATE folder (folder names must be entered in capital characters). The software should be downloaded to the UPDATE folder. After the download is complete, the media must be connected to the set-top box. Next, on the console, go to “Settings” > “System Update” > “Update from Storage Media”. All you have to do is select the carrier and wait certain time while the system is updated.
The official firmware can only be changed to a newer one. Rollback to older versions is not available. This may be due to the fact that Sony creates new firmware when the old ones have already been hacked. That is, when a user wants to “roll back” the system, Sony suspects him of using unlicensed content and tries to prevent the offense.
Considering that on the official firmware it will not be possible to play pirated games, run homebrew programs, or launch game images, it is quite natural that many will want to install unlicensed firmware on their console. 
To install custom firmware, you will need a formatted hard drive. Installation directly via the Internet, as is the case with official firmware, is not supported.
Manipulations with a flash drive when installing custom firmware are exactly the same as when installing official software. The media needs to be formatted and two directories created: PS3, and UPDATE in it.
Among unofficial firmwares, Rogero 4.55 and 3.55 kmeaw are very popular. 
Regardless of which firmware was selected, the downloaded update file must be renamed PS3UPDAT.PUP (this is the name of the file with the official firmware). Next, the flash drive needs to be connected to the set-top box, and the set-top box must be disconnected from the power supply. As soon as the set-top box is turned off, you need to connect it to the outlet again and hold down the power button. At this time, the set-top box will turn on and off. After this, you need to press the button again and hold it until the console makes two characteristic “squeaking” sounds. After this sound, the button should be released immediately. The set-top box will start recovery mode. Next, all you have to do is take the joystick and go to “Settings” and from there click “System Update”. Now all that remains is to wait for Playstation to install the firmware itself and allow gamers to enjoy the full gaming variety.
Once the installation is complete, the set-top box should reboot. You can make sure that the update has actually arrived on the console using two points that were not there before: Install package files and /app home/PS3_GAME. 
In order to play games without purchasing licenses, you will need the MultiMAN manager. It can be downloaded to a flash drive from specialized forums. Next, having connected the drive to the console, you need to select “Install package files” and write the path to the manager download file.
After the manager is installed, you can safely download games from torrents and “throw” them into the GAMEZ folder, after which they will be available on the console. You just need to find the game in the MultiMAN manager, click on the “cross”, after which the game image will be automatically mounted and the action will begin!

Today, many people play a variety of games. Some, and some on game consoles.
As for game consoles, today the console is very popular Sony Playstation 3. Many people buy themselves this console and a bunch of different games, and then disappear into games all day long. But there is one “but”: you can only play licensed games on the Sony Playstation 3 console. It does not accept any other discs. What to do? After all, licensed discs with games sometimes cost a lot of money.
In order for your Sony Playstation 3 game console to be able to run all games - licensed, downloaded, and amateur programs, it needs to be flashed. And it’s best to flash it with custom firmware. Custom firmware is a version of the firmware modified by a user or group of users. You can install this firmware yourself. All you need is time and following certain steps.
To flash your PS3 you must have the following items: the Sony Playstation 3 console itself with official software 3.55 or lower and a flash drive with the FAT32 file system. Instead of a flash drive, you can use any other drive that has this file system.
First of all, you will need to check the software version of your set-top box. This is quite easy to do. Come to " Settings"PS3. Next, search and click on the item" System settings".

Then in the window that opens, look for and click on the item " System Information".

After clicking on it, a window will appear indicating the PS3 software version. If it meets the requirements stated above, then you can safely proceed with the firmware.
Now you will need your flash drive. Check her file system again. . If everything is normal, then create a folder in the root of the flash drive called " PS3". After that, in this folder, create a folder that you want to call " UPDATE". After this, you will need to download the archive with the official update for PS3.
Next, unzip the archive and find and copy the official firmware file in it PS3UPDAT.PUP to a folder UPDATE, which is located in the folder PS3. After that, connect the flash drive to the console. Next in the menu " System update"search and select item" Updating from storage media".
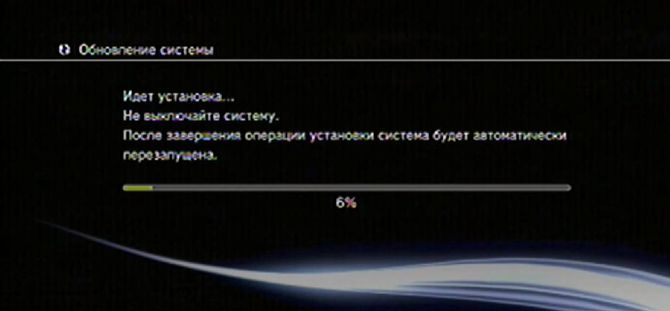
After these steps, the set-top box will begin updating. After the update is complete, your set-top box will turn off. Turn it on and check the software version. It should now be version 3.55. All this had to be done if the software version on your console was not 3.55. Now you can install custom firmware.
Again, take a flash drive that uses the FAT32 system, and again create a folder in the root folder " PS3", and in it a folder " UPDATE". Then follow the link to download the firmware and unzip it. And again copy the file PS3UPDAT.PUP to a folder UPDATE located in the folder PS3. After that, connect the flash drive to the console. After this, completely turn off the power to the set-top box and then turn the power back on again.
Then hold down the power button of the set-top box for 30 seconds. During this time it will turn on and off. After this, you again need to press and hold the power button. After this, the console should beep twice. When you hear this, release the button. Your console should boot into recovery mode.
Now you will need to connect the joystick to the console and press the PS button. After that, select " System update". Once updated, the console will reboot again and then go to the menu " A game" you should see the following: "I install package files" And " /app_home/PS3_GAME".
Well, the final step of all this will be to download and install a manager for launching games on this firmware version. Copy the downloaded file to the root of your flash drive and paste it into the PS3. Next, go to the console menu " Games", then " Install Package Files". And set the cross on the joystick here " multiMAN".
If you've done everything correctly, you'll be able to enjoy games on your custom PS3 right away.