How to return to basic settings. How to do a Hard Reset and save data on an Android smartphone. How to delete data from your phone using the Find My Device service
Every Android smartphone has a recovery mode that allows you to erase all data from the internal memory of the smartphone and return it to factory settings. However, this method is not always effective.
If you were unable to perform a hard reset (aka factory reset) through Recovery mode, Google has provided a special command line utility, Android Debug Bridge, to access your mobile device and execute certain commands through your computer. So you can do a factory reset via your computer.
We would like to point out that ADB commands to reset settings via computer are intended for advanced users. But, if you read our instructions carefully, you should not have any problems.
Instructions: How to reset settings via computer?
Step 1
Go to the Android developers website and download the Android System Development Kit. Right-click on the ZIP archive and select "Extract All". Click the Browse button and select the C:\Program Files directory.
Step 2
Go to the folder where the files were extracted and press "F2" to rename it. Give the folder a simple name, such as "AndroidADT".
Step 3
Right-click on "My Computer" and select "Properties". Click on the "Advanced System Settings" option and in the "Advanced" window, click on the "Environment Variables" button.
Step 4
In the System Variables window, select the Path option and click the Edit button. When the window for editing system variables opens, scroll to the very end and write the path to the archive that you unpacked earlier (“;C:\Program Files\AndroidADT\sdk\platform-tools\”) (without quotes). Make sure you add a semicolon at the beginning of the path. Click "OK" to save your changes.
Step 5
Hover over the top right corner of the screen and click the Search button. Type “cmd” in the search field and click on the program icon in the search results to launch a command prompt window.
Step 6 
Turn on your smartphone and connect it to the computer's USB port. Write "adb shell" and press "Enter". When ADB connects to the mobile device, write “--wipe_data” and press “Enter”. Your phone will reboot into recovery mode and automatically reset to factory settings.
Now you know how to reset settings via a computer.
Hello friends, in this article we decided to tell you how to restore laptop to factory settings. Let's start with the manufacturer Toshiba (who is interested, you can read a separate article -), the second we will consider the Sony laptop, the third HP pavilion. Separate articles are written for laptops, and,. Well, then we will try to supplement the article with information on products from other manufacturers; judging by your letters, this topic is of interest to many of our readers.
- Good day, I wanted to ask you how to restore a laptop to its original factory settings? I know that these settings are located in a hidden partition of the hard drive, but I carelessly deleted this partition and now when I try to roll back to factory settings I get an error. I have not created recovery DVDs and in general, I have never had the opportunity to restore a laptop to factory settings. What is the way out of my situation?
- Hello admin, please explain what I should do. A Toshiba laptop, it has a hidden partition, also a C: drive and a D: drive. I didn’t touch the hidden partition, but on drive D: I deleted everything, and now I can’t roll back to factory settings, they say Toshiba laptops use a hidden partition and some other folder HDD RECOVERY, which is located on the disk, to restore factory settings D:. What should I do now?
- I bought a Toshiba laptop, the instructions for the laptop say, if you want to roll back to factory settings, press the F8 key, the recovery program will start. I pressed it, but Additional download options are launched and that’s it... And then what to do? And another question, when you first started it, a message appeared - We recommend that you create a resuscitator media on a USB flash drive or DVDs, using the Recovery program, it will help you restore the contents of the computer to the original factory state, even in the event of serious damage to the computer. Explain how to use this resuscitator media in case of problems?
- Hello, tell me how to restore a Hewlett-Packard (HP) laptop to factory settings if the laptop does not boot at all. When loading Windows exits with an error.
- Admin, answer this question. All laptop manufacturers equip them with a special RECOVERY program, located in a hidden section. Using this program, you can roll back the laptop to factory settings in case of serious problems with the operating system. Question – Is there any alternative to this program?
How to restore a laptop to factory settings
When does the thought of restoring our laptop to factory settings occur to us? That’s right, when we no longer understand what’s going on with it, and most importantly, the laptop itself doesn’t understand what’s happening to it, because of the dozens of unnecessary partitions created on it, four installed operating systems, thousands of different programs and three antiviruses.
- Note: Before performing a factory reset, you can copy all data from the C: drive and desktop using .
Many users may notice that in such a situation you can reinstall Windows with all programs, drivers and everything. But I, in turn, will notice restore laptop to factory settings, for an inexperienced user, much easier. Then you won’t have to worry about finding and installing drivers for all devices, you just need to reinstall the necessary programs and that’s it. The only thing that confuses many people in this situation is that many have never tried restoring the laptop to factory settings even once in their lives. To introduce you to this restoration is the purpose of our article; I hope after reading it, you will have a better idea of how this can be done.
I have to restore factory settings on various laptops quite often and I want to say that the recovery mechanism itself is almost the same on all laptops, but of course there are always nuances that are better to know in advance.
First rule. During a factory reset, the AC adapter must be connected to the laptop at all times.
You reboot the laptop and press a certain key on the keyboard when loading, then the factory reset program starts, this is where you need to be careful. The factory reset program may offer you the option of restoring just the C: drive or restoring the entire hard drive. If you select drive C:, then only it will be restored to factory settings, and the remaining partitions with your data will remain untouched. If you choose to restore the entire hard drive to factory settings, then all the partitions you created, with all your files, will be deleted and your laptop will be in the same condition as at the time of purchase.
Where is the laptop factory reset program located?
Usually in a hidden section of the laptop, which is called the “Recovery Partition,” the volume is up to 20-plus gigabytes. You can see it if you go to Computer Management->Disk Management. It is advisable not to delete this partition, otherwise you will not be able to restore the laptop to factory settings.
Owners of a Toshiba laptop need to know that in addition to the hidden RECOVERY partition, they also have a HDD RECOVERY folder located on the D: drive; this cannot be deleted either.
Note: Friends, if the hidden partitions on your laptop are not deleted, but the factory reset program is not working, read our article -.
Why create laptop recovery DVDs?
As soon as we bought a laptop and turned it on, on the screen, immediately after the Windows desktop appears, a service window from the laptop manufacturer appears with a proposal to create laptop recovery DVDs. That is, we will create this same hidden partition with factory settings, but on DVDs. This is done in case the hidden section of the laptop, for some reason (usually due to the user’s fault), becomes damaged or is deleted completely.
To create recovery DVDs, you usually need 3 blank CDs. If there are serious problems with your laptop, for example, you cannot load the operating system at all, and your hidden partition has been deleted, we can restore the laptop to its factory state using previously created recovery DVDs.
Hotkeys for restoring laptops to factory settings
ASUS – When the ASUS splash screen appears, press F9
Acer - Alt+F10
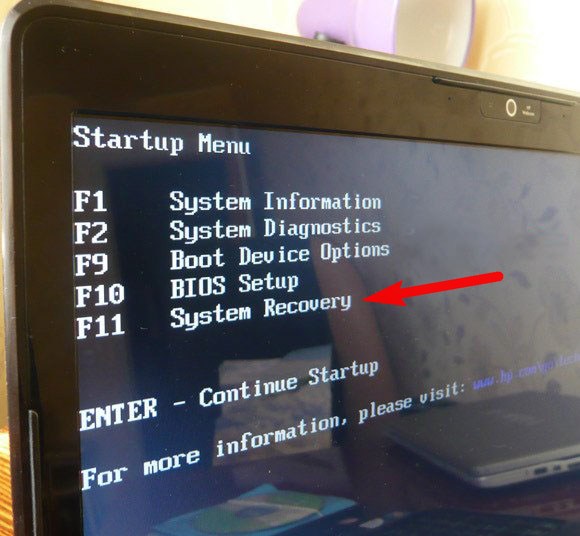
HP pavilion - when turning on the laptop, press the esc key. Enter the start menu, then press the F11 key
Samsung - F4
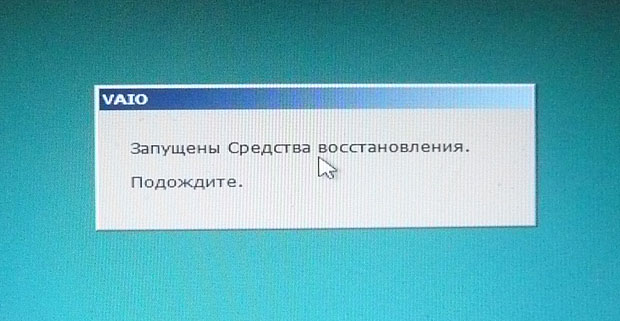
Sony vaio - F10. New Sony VAIO laptops use a special button Assist, try pressing it when loading. Loading VAIO Care, select from the menu Start troubleshooting (Recovery) -> Select keyboard layout Russian -> Diagnostics -> VAIO Recovery Tools -> Windows 8 -> Run the Recovery Wizard(System recovery in step-by-step mode).

Toshiba - F8 or on the latest models 0 or even sometimes you need to press Fn+0
Packard Bell - F10
Dell inspiron - when the dell splash screen appears, press Ctrl+F11
Fujitsu Siemens - F8
LG-F11
Lenovo-F11
So, first we restore the Toshiba laptop to factory settings, press F8 when loading (if you have one of the latest models of Toshiba laptop, then immediately when you turn on the laptop, press and hold 0), a window appears Additional download options. Choose Troubleshooting your computer and press Enter.

Selecting language settings.


We select the Toshiba HDD RECOVERY recovery tool or it may be called Toshiba Recovery Wizard.

In the next window, we are warned that drive C: will be restored to its original state, that is, everything will be deleted from it and its state will be restored to the state at the time of purchase of the laptop, drive D: will remain untouched.


You cannot interrupt the operation, so make sure that the AC adapter is connected to the laptop. Click Yes and start the process of restoring the laptop to its original factory state.

A factory reset process is in progress.


The software and drivers are being installed.


Choose a username and password for your account. We set the date and time, they are usually correct by default. If you wish, you can register your laptop to extend the warranty.

First launch of Windows. That's all
How to factory reset a Sony laptop
When booting, press the F10 key and enter the Windows Boot Manager, select using the keyboard Launching VAIO Recovery Center.

A window appears in front of us, in which we can familiarize ourselves with the recovery options.
For example, we choose Recover drive C: and in the next window we read information about what will be restored.


Disk C: is restored to its factory state, all software is reinstalled, but not software installed after purchasing the computer, it will have to be installed again. This program deletes all files on the C: drive, but does not affect files on other partitions.

If you and I choose Completely restore the system, then everything on the C: drive and all other partitions will be deleted. After recovery, all disk space will be occupied by drive C:


How to restore an HP laptop to factory settings
If the laptop does not boot at all due to system errors and you want to restore its original settings, then, in order not to lose your data, you can boot it from any Live CD, then transfer important files to a portable hard drive, then restore the factory settings, since Restoring factory settings will delete all your data from your laptop.
Press the key when turning on the laptop Esc.

We enter the boot menu, as we see, the F11 key is responsible for restoring factory settings - System Recovery. Press the F11 key.
A window appears HP Recovery Manager. Here we need the item " Restoring the system to its original condition when shipped from the manufacturer».

Click on “ Restore without creating a backup copy files" and click Next.

Now you need to disconnect all external devices: printer, scanner, mouse, click Next and the process of restoring the HP laptop to factory settings will begin.
Is there an alternative to the laptop's built-in factory reset program? Yes there are, these are programs and and they have much more opportunities.
Greetings, dear readers.
All computer users sooner or later encounter a problem when the equipment starts to malfunction. Moreover, the main problem is hidden in the operating system. Particularly uncomfortable is the situation when the OS simply stops starting, because the process of saving important data located on the desktop or in my documents becomes much more complicated. In addition, there is a need to restore functionality to the device. Later in the article, I will tell you how to reset Windows 7 to factory settings in several ways to avoid reinstalling the system.
This method is considered the simplest and fastest. On the maximum build of Win or any other, you need to go to " Safe mode" To do this, reboot the device and press “ F8" A small menu will appear in which you need to specify “ Last Known Good Configuration».
After this, the computer will automatically restore the previous settings to continue the procedure.
Important! Sometimes you can get into “Safe Mode” on laptops in another way:
- ASUS – F9;
- Lenovo, HP, LG – F11;
- Samsung - F4.
This solution will allow you to restore functionality to your device in the shortest possible time. It is possible to roll back drivers and replace important system elements responsible for malfunctions. This method returns everything to its place in case of minor problems and freezes.
After this, users can restore the operating system to its original state. True, for this you need to have a corresponding point in the system area.
Recovery
Microsoft systems have a lot of useful tools. One of them independently creates restore points at different times during use of the device. This allows you to fix the working position of not only Windows 7, but also all installed software, including drivers, programs, etc. Of course, all this is possible if the function has not been disabled.

So, so that you can always return your computer to its original state, after installing the operating system and main applications, you need to create a point in memory. To do this, we perform several actions:
- Close all active applications.
- Let's go to " Start" And " Control Panel».
- We are interested in the icon " System" Here we see “Home Basic” or any other. Select " Protection…».
- A new window will open. We are interested in " Creating a restore point».
- Enter the name and click on start.
- We are waiting for a message about successful completion.

Recovery also takes place in a few simple steps. Where is the right tool? Let's look:
- Open " Start" And " Control Panel».
- Select " Recovery", and then " Launch…».
- A new window will appear in which we mark the first created point.
- Pressing " Finding Affected Items", users will see a list of programs that will change.
There is also the possibility of restoring the device’s functionality through an image on disk. True, for this it needs to be saved in advance to the appropriate portable memory.

Important! If the database was created with some errors or the media with the image is damaged, then the system start will most likely be interrupted.
Boot disk
In some cases, users may need a special boot disk to restore their device. It is with its help that you can roll back to a working or even suitable version on a pirated or official version.
To do this, you need to perform several steps:

Hidden system partition
Some laptops and computers (especially if they were purchased with an operating system already installed) have a special partition on which all the necessary tools for returning the OS to its original state are stored.

Important! If you have previously reinstalled Win x64 or 32 and used formatting, most likely the corresponding area no longer exists.

Device manufacturers offer users special programs through which the process takes place. There is a separate button for starting. Or there is an option to find the corresponding shortcut in “ Safe Mode».
After starting a suitable solution, indicate “ Return the device to the time of purchase».

Important! During the procedure, all files located on the hard drive will be deleted. In other words, the device will return to its state at the time of purchase.
You can achieve the desired result through the command line. To do this, in the appropriate tool we indicate: “ man Restore-Computer –Detailed" And confirm by pressing “ Enter».
As always, thematic video:
I hope this article will help you return your device to functionality.
This happens often: over time, the system of your Android device becomes clogged, your smartphone or tablet starts to work slowly, and many errors constantly appear. For some, this may be an excellent reason to replace the gadget with a newer model, but this option is not at all necessary. If the problem is only in the system, then you just need to return to the factory settings.
Android factory settings: what is it?
This must be taken literally: the smartphone will return to the state in which it was released for sale. All user files will be erased, except those stored on the memory card. But such an operation can give your device a new life. And the files can be pre-copied to removable media, so losses will be small.
How to reset settings using the interface?
In order to return Android to factory settings, you do not need any special applications or knowledge of programming languages. This operation is initially built into the interface of your device, and launching it is quite simple.
Of course, the interface of a smartphone or tablet will differ depending on the device model and version of Android, but using Samsung phones as an example will you understand? Where can I find this function?
- On your Samsung smartphone, go to “Options” (“Android” settings), then to “Accounts” and open the “Backup and reset” section.
- In this section you can enable/disable archiving, auto-recovery, including resetting data. Click on "Reset Data".
- You will see a warning that all information will be deleted from the device's memory, including your Google account and downloaded applications. Confirm data reset.
- The device will reboot. After the next turn on, the Android factory settings will be restored.
On earlier versions of Android (up to 2.1), is there such an option as resetting data? located in the "Confidentiality" section.

How to restore settings on Android using Recovery?
If your smartphone or reset settings, you can use recovery mode.
Again, recovery mode is launched differently on different models. But the principle of switching on is the same: you need to hold down certain keys, turning on the device. Look at the exact key combination needed for your model in the user manual, or ask technical support on the manufacturer’s website. On Samsung smartphones, recovery mode is launched as follows:
- Turn off the device if it is on.
- Press the Volume Up key.
- Without releasing the Volume key, press the Home key.
- Without releasing both buttons, press the Power key.
- Keep the keys pressed until Recovery mode starts.
- Select wipedata/factoryreset - this will completely reset Android settings from your device.
If, for example, you have a Sony Xperia Z smartphone, then you need to start the recovery like this:
- Turn off your device.
- Press the power button and, when the indicator located at the top of the phone above the display lights up, press the volume up or down key several times.

Sync and restore data on Android
There is a way that will help you quickly install applications lost due to a factory reset. Instead of remembering and searching for each application separately, when you open the Play Market, simply go to “Menu/My Applications”. Next, click on the “All” tab. You will see a list of all the applications you have previously installed.
Before deleting settings on your Android device, it is highly recommended to enable synchronization. Thanks to synchronization, you can easily recover all lost data.
To enable Gmail and calendar entries in the future, turn on your account sync. Go from the options menu to the Accounts section and check the options you need.
Photos can be recovered if you have a Google+ account. All pictures taken will be automatically uploaded to the server. In addition, the user will be able to access his own photos from any other device.

Android Mail
After the settings are deleted on a device running the Android system, you may want to set up your mail again. As was said, when returning to the factory state, in addition to user files and applications, all accounts are also erased from the memory of the smartphone or tablet. If you did not have synchronization enabled before resetting the settings, you will have to restore all user options manually. But there's nothing wrong with that. Setting up mail on Android is done through a special application.
The factory version implies the condition of the device after purchase, that is, the memory is not completely eliminated. You will have at your disposal the built-in applications with which the smartphone went on sale. Now you'll need the Mail app.

Instructions for setting up mail
So, setting up mail on Android is as follows. After launching the application, you will be asked to either create a new account or add an existing one to which your Android phone was linked. The settings should be as follows:
- Enter your account information (login and password).
- Select the protocol for connecting to the mail service. This is necessary to confirm your password. It is best to specify POP 3.
- Next, you will need to specify the domain of your email client. For example, Google's mail server will look like this: pop.gmail.com. And the Yandex server: pop.yandex.ru. On Android devices, it is most convenient to use Google mail.
- Set the parameters for outgoing emails. You must enter the name that the outgoing message server uses. This is done according to the same principle by which you specified the domain of the email client. For example, smtp.gmail.com.
In the same way, you can optionally add an additional mailbox.
Resetting the Android operating system to factory settings allows you to restore the normal operation of the device in case of frequent freezes, slowdowns, automatic shutdowns, reboots and other software failures. If you decide to perform this procedure, you need to know that it will delete the following information:
- all programs installed on the device;
- saved text and multimedia messages (SMS and MMS);
- notes in a notebook;
- data from the phone book;
- saved passwords from existing accounts (for example, GMail, Skype, etc.).
In this case, the information located on the flash drive will not be affected. Therefore, before completely resetting the Android system, you should save your personal information in a safe place by copying it to a memory card or PC.
Methods to reset Android to factory settings
In the Android OS, resetting a phone or tablet to factory settings is provided by the developers, so no additional programs or devices are required to perform the reset.
There are three methods to restore default settings on Android:
- through the standard gadget menu - recommended for use in cases where the device can be turned on and entered into its main menu;
- using service combinations – used when, after turning on the phone, you only have access to the dialer (for example, you forgot your password to log into the system);
- using the Recovery environment is the only option to return Android to factory settings when the device does not turn on or freezes at the company’s welcome logo.
Restoring initial settings through the gadget menu
If your phone or tablet starts to slow down or freeze periodically after turning it on, consider yourself very lucky, since you will have time to save all your personal data in a safe place (for example, on a flash drive or computer hard drive). To do this, before resetting, it is recommended to use the function of synchronizing your phone (tablet) with a PC.
Synchronization is a procedure that allows you to eliminate the difference between two operating systems (Windows and Android) and copy all important information from your device to your computer. Many programs have been developed to perform synchronization, among which MyPhoneExplorer is considered the most effective.
To copy important data (phone book, messages, notes, etc.) from your phone to your PC, you must:
After saving the information, you can safely reset the device to factory settings. To do this you need:

Some models of gadgets require the user to have root rights to change system data, including to start resetting. This allows you to protect the OS from accidental deletion of system files.
Using service combinations
Any operating system for mobile devices (Android, Windows Mobile, Symbian, etc.) has special digital-symbol combinations that can be used to return the device to factory settings.
To do this you need:
- Enter dialing mode.
- Enter one of the following combinations: *#*#7780#*#, *2767*3855# or *#*#7378423#*#*.
After this, the factory reset will automatically start.
Starting the Recovery procedure
If you cannot turn on the phone and, accordingly, use one of the above recovery methods, the built-in Recovery utility comes to the rescue. To run it you need:
- Turn off the problematic gadget completely, that is, wait until all the keys and the screen go out.
- Press and hold a certain key combination for several seconds. Different device manufacturers have different combinations:
- For LG phones – volume down button + power key. When the welcome logo appears, you must release and press Power again;
- For Samsung – return to main menu key + power + volume up button;
- For Lenovo - power button + volume in the middle.

If you cannot restore Android after performing the above steps, you need to do the following.