Backup is what saves. Backup and synchronize computer data with Backup & Sync from Google
Why is backing up personal files so important for a user? Because HDD your computer or at any time, and most often, at the most inopportune time, can fail. Believe me, I have personally encountered this more than once.
Error software or system failure can easily delete your files, so copies of them are crucial in such cases. This does not mean that you need to back up all the data stored on your PC. This will not only eat up precious free disk space, but will also take a lot of time.
An important rule is that the precious data you need must be in at least two different physical places at the same time. Creating backup copy and by deleting the original, the first one will no longer be called a backup. At first glance, these are obvious things, but how painful it is when the backup drive fails.
Today there are many ways to backup data. From transferring them to a separate hard drive (please do not confuse them with one drive) or external storage, before uploading to a remote server via the Internet (to the Cloud).
The choice of tools to accomplish this depends on the user's preferences. You can use system tools in Windows or third-party programs.
For most users, I recommend creating backups separate files and folders, and not the entire system as a whole (). After all, after a significant disruption operating system, experts prefer to reinstall the OS from scratch rather than search for the cause of the failure and its subsequent elimination.
BACKUP
The most significant and important thing now is to create duplicates of your personal files. On a Windows computer they can usually be found along the path:
C:\Users\User
where User is your name account. Copy this directory and store a copy of it in another location.
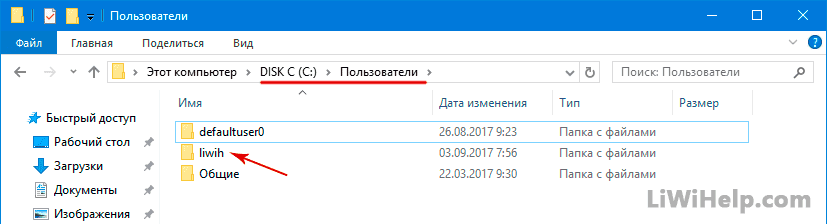
As you might guess, this directory contains folders with important files your account. They store: documents, videos, music, images, contacts, the “Desktop” folder and others. How much important data do you store on your desktop that you don’t want to accidentally lose? I think a lot!
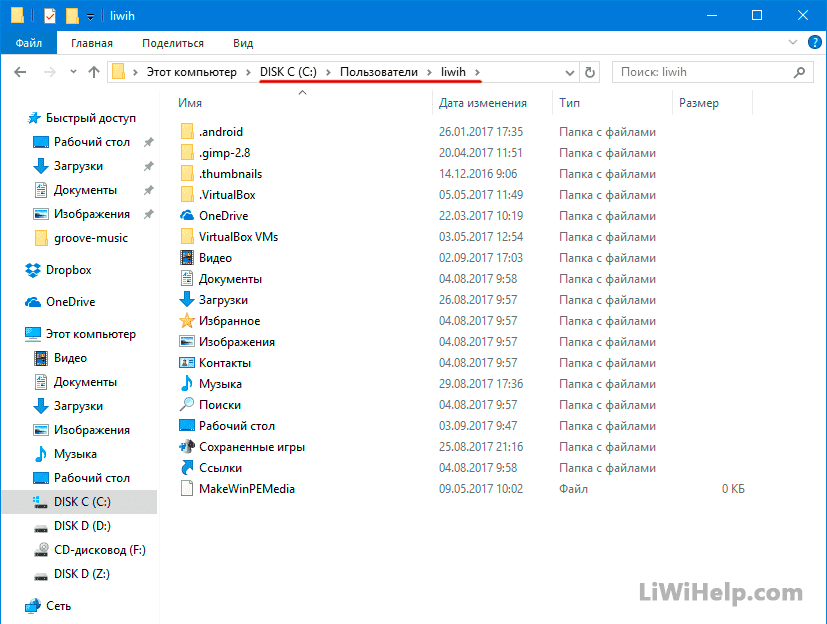
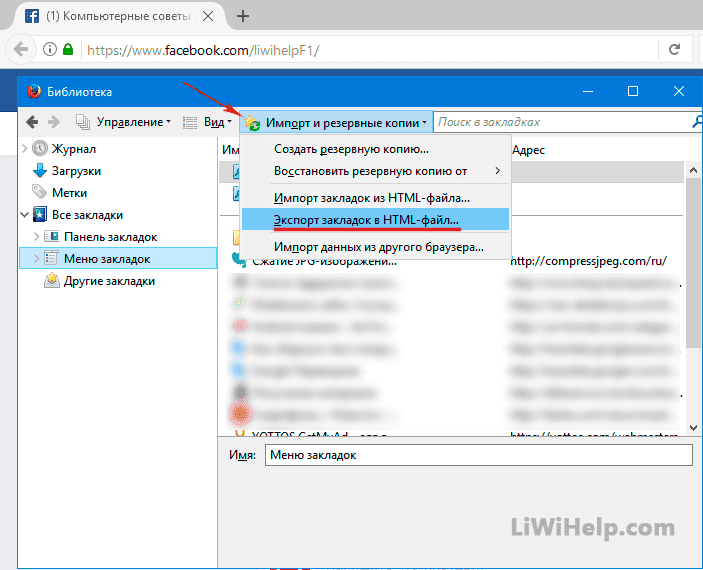
Try showing hidden objects as well. The “AppData” folder will also appear in this directory, which contains program settings and other account-specific data. If necessary, you can use them to restore settings individual applications. For example, return Internet browser bookmarks.

Additionally, I recommend for applications such as game client, mail client and others that support built-in redundancy functions, use them as well. It will be easier than searching necessary files in the "AppData" folder.
Remember, you should never back up the Windows operating system system directories and Program Files. The first one contains system files, which are not portable between different hardware, the second is files installed programs, which are usually reinstalled from scratch.
It wouldn’t hurt to organize automation of the backup process, which will help you avoid losing your important data at the most inopportune moment, for example, for the reason “because I forgot.” You will have to choose the tools for this yourself. Just remember, a copy of the above-mentioned user-specific data directory is very important for later recovery after an unexpected system or disk crash.
P.S. We keep a large list of computer tips for you!
P.P.S. Do you want to be the first to know when new tips are released? Visit us on FACEBBOOK or GOOGLE+ by clicking on the buttons located at the top right of this resource. You can also add us to your browser bookmarks!
Hi all. Here you will get acquainted with the program from Google for backing up files and folders with hard drive computer.
Data security is an important task for ordinary users, be it a computer or a smartphone. But the important question in this regard is how do you backup your data? Locally or on cloud drive. And how often do you do this?
The information in the article highlights the fact that cloud backup can be a convenient solution if you are concerned about privacy. The most popular solution for storing cloud applications belongs to Google. Previously, you could sync your device files with Google Drive om that existed on your PC as a folder. Everything you copied to this folder ended up on your Disk.
Just recently, Google introduced a backup and sync tool that can automatically retrieve data from your computer and upload it to your Google Drive. Some of the benefits include:
- Your data is not lost if the computer dies or encounters some problems.
- Data is available everywhere without platform restrictions. For example, you can view files on your Android device using Google apps Disk. This also prevents unsuccessful attempts connecting the phone to a PC and transferring data.
- You can copy data from multiple PCs and store it separately in your Google Drive.
How to install a file and folder backup program
Setting up Backup & Sync is a simple process, but it does require a few two-click steps. You can start by downloading the tool from the Google Drive website.
Download Backup & Sync
Once the installation is complete, a setup wizard will automatically appear on your screen. Follow these steps when going through the Backup & Sync tool installation wizard:
1. Click "Start" to start the installation process.

2. At the first stage, you need to log into your account Google entry. Three options will be offered here: using your phone, using a password, or restoring access to your Google account.


3. In the next step you can find various options adding folders, selecting download quality, etc.

Click " Select folder" To add new folders from your PC, check the ones you want to upload to Google Drive.
You can choose between high quality(with unlimited storage) and original quality (with limited storage). The images look pretty decent in high quality, and I use the same for backup and social media use. Yes, you can directly share Google Photos with your social networks. Take another one original quality if you decide to expand your storage capacity in the future.
When you enable the "Upload photos and videos to Google Photos" option, the content will appear in Google Photos and will also appear in the corresponding folders in Google Drive.
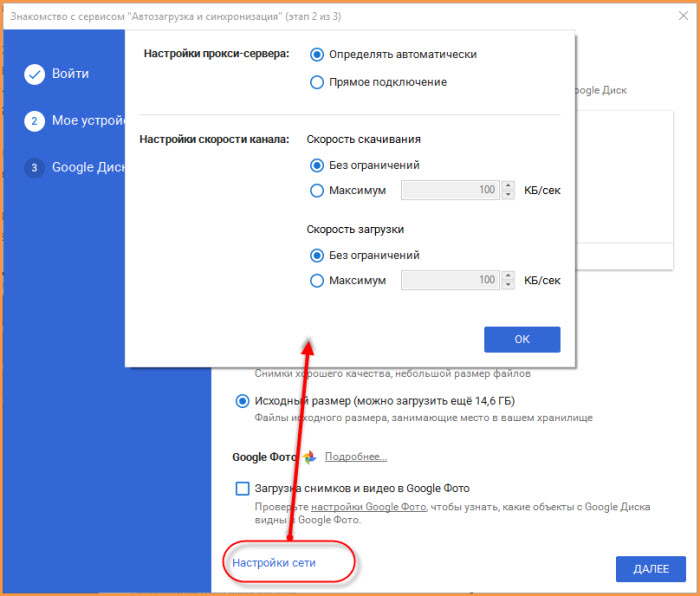
4. At the bottom of the window there is a “Network Settings” option. It allows you to enable a proxy server for the tool " Backup and Sync" and select the upload and download speed.
6. This step will ask you if you want to sync your Google Drive to PC. The data from your Google Drive will live in a dedicated folder on your PC. You can sync all of MyDrive or some specific folders.
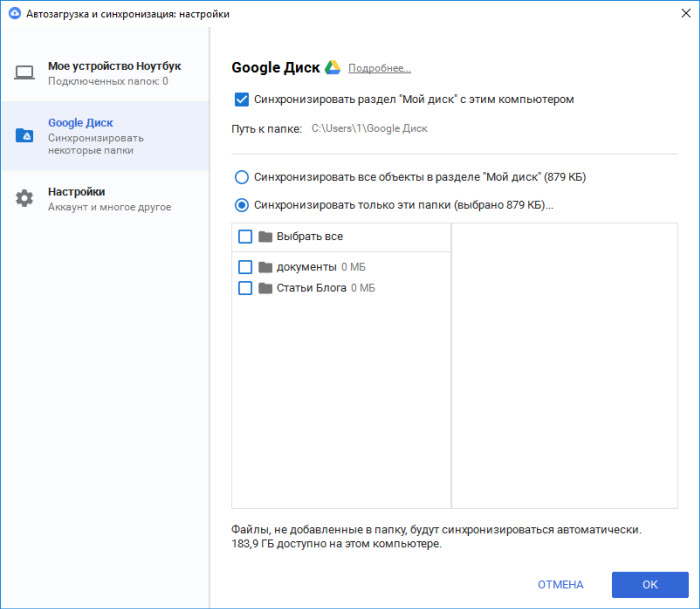
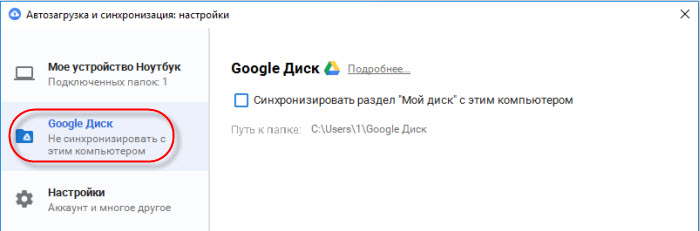
7. Disable syncing my drive with this computer if you don't want to enable the sync feature.
8. Click " Start" to enable the Backup tool on your PC. A notification will appear in the lower right corner of the screen.
From now on, the backup tool will automatically download any data you put into shared folders. You can find Backup & Sync in the notification area as a cloud icon with an ascending arrow.
Learn more about backing up with Backup & Sync
In your Google Drive, you can access your synced data in the new Computers section. Another plus is that Google Drive stores data in the same folder hierarchy as on your computer.
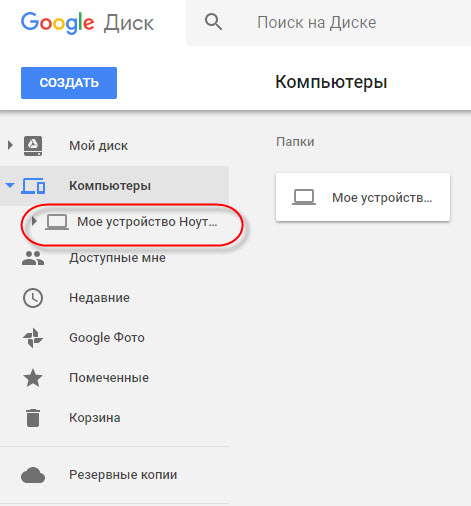
Google Drive also separates data downloaded from different computers. When you expand the Computers section, you will find the names of the computers for which you have enabled the Backup & Sync tool.
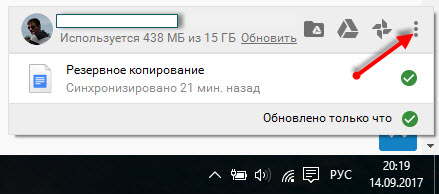
On PC, click the tray icon that looks like a cloud with an arrow, then click " Settings" (three vertical dots) to view the list available parameters. If you want you can suspend / resume synchronization. Click " Settings" to view all sync tool settings.
The Settings window allows you to change various options that you saw in the Setup Wizard. You can add or remove folders from the list of shared folders, change download quality, etc.

![]()
There is a Google Photos option; you can enable this checkbox if you want images and videos to be displayed in this section. Unlock it if you only want to make backups and see them in the appropriate folder hierarchy in Drive.

It is possible to change the name of your device. In the Settings window, click the device name to edit and assign the name you want.

In chapter " Settings» displays information including your available storage quota and the option to disconnect your account from the tool. Check the boxes to open the backup tool when Windows startup, show a warning when deleting a shared folder, and show the sync status for files that have been copied.

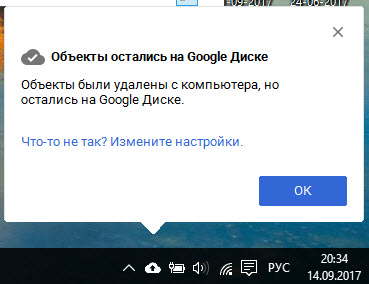
Delete data saved on Google Drive and PC
In chapter " Deleting objects» you can choose whether the data is deleted from your PC and Drive or from the place where you deleted it. For example: if you select "Don't delete items externally", a file deleted on your PC will still be available in Drive. A pop-up window appears when you delete a file.
Google Drive Sync
Click Google Drive on the left side. In this section, you can enable or disable synchronization between Google Drive and your computer. If you disable this feature, as mentioned, the data in MyDrive will not appear on your PC.
How to sync USB drives and SD cards with Google Drive?
You may know that Google Drive Backup is not limited in scope local storage on your system. You can connect external media such as flash drives, SD cards and even cameras to enable the sync feature for them.
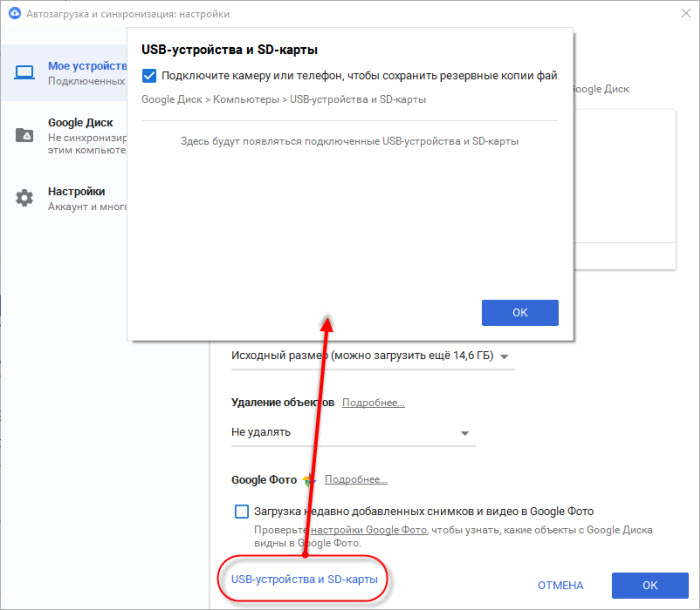
When you connect a USB drive or to your computer, the backup and sync program automatically asks if you want to sync it or not. Click "Back" to start the synchronization process.
You can control USB devices V Settings > USB Devices and SD Cards. Synced USB devices will appear under computers with a different name. They won't be clogged with your PC's backup data.
What can you do with the downloaded data?
The data dumped by the backup tool on your Google Drive doesn't sit easily. It's more useful than you think. Google Drive can integrate various web apps that you can use to edit files online. For example, MS Word files can be edited using Google Docs, Excel files With using Google Tables, etc.
01.10.2017 - Admin
You need to make a copy of the site before an unexpected force majeure event may occur to it. Many not only beginners, but also experienced people in blogging neglect the backup of their project. But when a technical failure occurs or, even worse, all files and data disappear, they shout “guard.” In order to avoid such a situation, today we will figure out how to make a complete copy of the site.
You have been running your blog for about a year or two, the traffic is already 3000 - 4000 thousand people per day, the monetization of the blog is 50,000 rubles, everything is just fine. And then suddenly your server crashes and all your data is gone forever. Still no blog. 😡
Or some kind of virus got into your blog, or a hacker hacked it, or maybe you did something through negligence - in short, anything can happen and these are not isolated cases, but a fairly common problem.
So, God forbid, if something like this happens to you, you can always restore your blog if you take care of creating a backup copy. Don’t neglect this, I beg you, so you don’t cry later!
How to backup a MySQL database
All articles you write are saved to the MySQL database, so if you write a blog almost every day, then I advise you to back up the database every day as well. Personally, I try to write every day, there are times when I miss a day or two, but I save the database every day, it doesn’t weigh much, and it’s peace of mind.
There are a lot of ways to make a database backup, but I will describe the simplest ones! A copy can be made either with or without the plugin. Let's look at these two options.
Copy of MySQL database without plugin
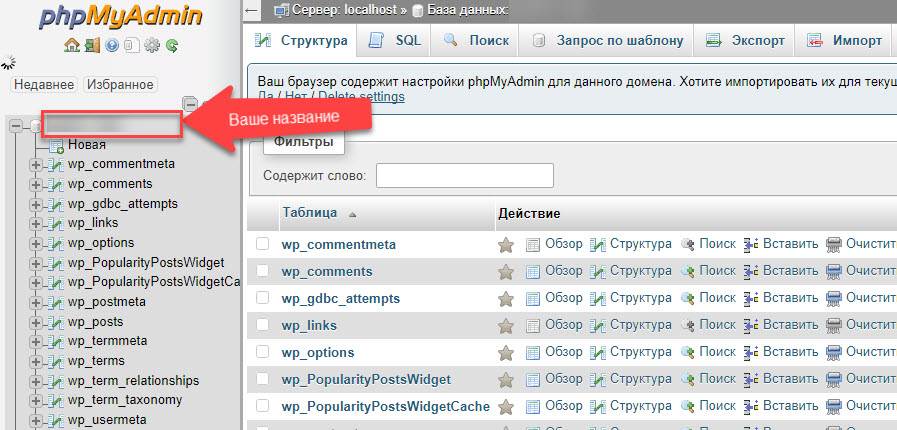
To do this, go to the “phpMyAdmin” panel on your hosting. On the left, click on the name of your database. You should see a list of your MySQL tables.
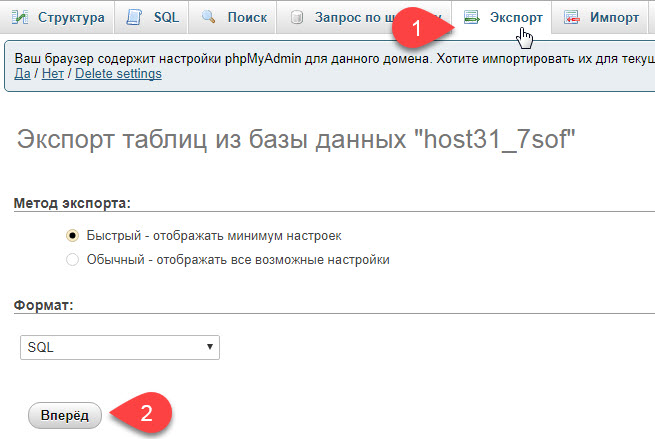
So we made a backup of our database. To restore data, we do the same thing, only instead of “Export” we select “Import” and load the saved copy. When you write one article a week, this method will suit you. But when you add articles every day or you have many authors, then backups need to be done every day. A plugin will help us automate this process.
Copy MySQL using a plugin
In order to make a database backup, we need to download WordPress plugin Data Base Backup. Download or install through the admin panel of your blog. I won’t explain how to do this, I don’t think there will be any difficulties. In the admin panel, go to the “Tools” => “Backup” section

Go to the settings page. We don’t need the first two blocks with the “Tables” and “Backup Settings” settings.
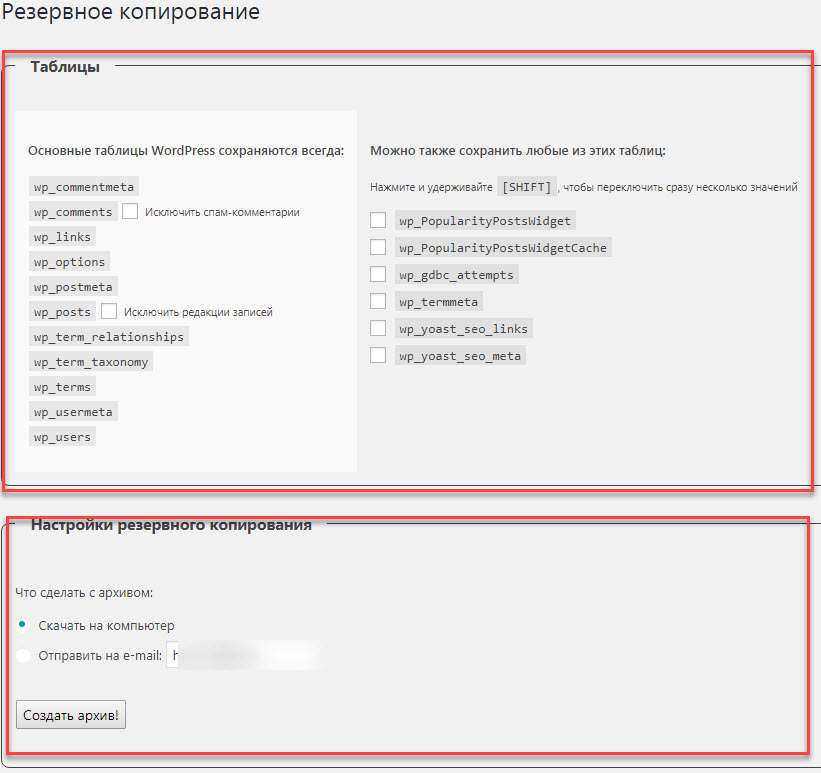
These settings are needed to create a one-time backup. We will create automatic backups for you. We go down below and see a block with the “Backup Schedule” settings. This is where we will make all the settings.
Everything here is extremely simple and clear. In the “Schedule” section, select the frequency of creating a backup copy; I recommend making a copy “Every day”. In the “Send by e-mail” section, indicate your email mailing address to which you will receive an archive with a backup copy of the database.
Next, in the “Include the following tables in the archive according to schedule” section, check all the boxes. I have six tables, you may have more or none at all. These tables are created by plugins installed on the blog, so they are needed, do not forget to check the boxes everywhere. Well, at the end, click “Remember schedule”.
How to make a copy of site files and folders
You can make a copy of the site using FileZilla, Total Commander or any other FTP manager. You can do it from your hosting control panel. We will look at an example using the FileZilla program.
You can download the program. Install and launch the program. Then you need to connect your computer to the hosting. To connect we need ftp data. All this data is written in the letter that you received after you purchased your hosting. If you did not save this letter, then this data can be found in your hosting control panel. Fill in the “Host”, “Username”, “Password” fields and click “Quick Connect”.
Having connected to your hosting, select the folder with your site. We left-click this folder and drag it to the desktop.

In this folder, which we just copied, changes to installing or removing plugins, editing appearance template, downloaded images are saved, and so on.
I back up this folder about once a week or after major changes. For example, I’ll install several new plugins, upload a couple of pictures, and so as not to lose it all, I immediately make a backup. Well, I think you get the point.
I hope everything worked out for you. Make a copy of your site regularly and sleep well. Good luck everyone, bye!