How to create a backup copy of iPhone, iPad, iPod data. iPhone backup iOS 11 backup
In this step by step instructions details on how to backup iPhone to computer or iCloud where backups are stored, how to restore phone from it, how to delete unnecessary backup and some additional information that may be useful. The methods are also suitable for iPad.
An iPhone backup contains almost all of your phone's data except settings Apple Pay and Touch ID, data that is already synchronized with iCloud (photos, messages, contacts, notes), installed applications. Also, if you create a backup on your computer but do not encrypt it, it will not contain the Health app data stored in Password Keychain.
To back up your iPhone to iCloud, follow these steps: simple steps on the phone itself (I recommend using a Wi-Fi connection):

Video instruction
You can use this backup after a factory reset or on a new iPhone: during initial setup, instead of “Set up as new iPhone,” select “Recover from iCloud backup,” enter your Apple ID information, and perform a restore.
If you need to delete a backup from iCloud, you can do this in Settings - your Apple ID - iCloud - Manage storage - Backups.
Apple's hardware products are unique in that they allow you to make a complete backup of data, which, if necessary, can always be restored or transferred to another device. In this article, we will tell you how to back up your iPhone, iPad or iPod.
Creating a backup copy is not difficult, and this can be done not only through the program, but also on the Apple device itself, and the data can be saved both to a computer and to cloud storage.
Option 1: iTunes
Before you start creating a backup, launch iTunes and connect your device to your computer using the included USB cable.
- Once iTunes detects the connected device (in our example it’s an iPhone), click on its icon in the upper left corner.
- Scroll through the contents of the window to the block "Backups" and select your preferred data storage location:
- iCloud;
- This computer.
The meaning of each of them needs no explanation. To ensure additional security, we also recommend checking the box next to "Encrypt local copy". Once you have made your choice, click on the button on the right "Create a copy now".

Note: A backup saved in iCloud can be restored without iTunes, directly from mobile device(via Wi-Fi). If you save the data to a computer, then to restore it you will need to use both it and the program.
- Even if you didn't choose to encrypt your backup, iTunes will still prompt you to do so. Click the appropriate button and,

If required, create and enter a password twice to protect your data.

Immediately after this, the creation of a backup will begin, the progress of which can be monitored in the upper area of the program window (filling scale).

This process will not take much time, and upon completion you will immediately be able to "Restore from copy" and, if there is such a need, "Change password", provided that it was installed.


This is how easy it is to back up your iPhone, iPad or iPod using iTunes. We recommend saving data in two places at once, that is, making two backups in a row - one to your computer, the second to iCloud.
Option 2: iOS device
The ability to use a computer and iTunes to create a backup copy is not always available to everyone. Apple Company took care of this and implemented it in iOS opportunity saving data from the device to iCloud.
Important: To create a backup in this way, you need Internet access, so if you have limited traffic, we recommend connecting to Wi-Fi. You will also need to have a sufficient quantity free space in iCloud.

Conclusion
By regularly backing up your iPhone, iPad or iPod, you will protect yourself from possible loss of important data, since you will always have access to them and, if necessary, you can restore everything.
Most happy iPhone owners have probably (more than once) heard about the concept of “backup”. However, not all experienced users know what it is backup, do not realize its importance and do not have even the slightest idea about how to create it.
This article is intended to answer a number of questions that shed light on the topic of backup from different angles. copy iPhone: its meaning and importance; methods for creating, restoring, transferring, and completely deleting.
Why do you need a backup? What data does it include? What data is not saved?
An iPhone backup is, in simple and accessible language, a copy of data from an Apple mobile device, which is stored in encrypted form on personal computer, either in cloud storage iCloud.
Creating a backup copy of your data is important because it is necessary to restore information in the event of:
- iPhone malfunction, theft or loss;
- purchasing a new smartphone from Apple, since having an up-to-date backup copy of the old device will make it possible to quickly transfer data from the old device to the new one;
- the emergence of problems with the operating system (iOS), which may arise in an inappropriate manner and cause a lot of inconvenience (for example, this concerns an unsuccessful attempt to update a mobile device to new version operating system).
Backups, regardless of the method of creation and storage location, contain the following data:
- personal settings of the smartphone (calendar settings, mail, ringtones, view of the main desktop and arrangement of icons);
- the Safari browser: data automatic filling forms, bookmarks, page browsing history;
- data contained in the Health application;
- SMS/MMS, message history in iMessage (for correct recovery, you must have a SIM card);
- ringtones;
- account and account passwords;
- information about installed applications and data (but not the applications themselves);
- paired devices via Bluetooth protocol;
- history of purchases made in the AppStore, iBooks, as well as iTunes Store;
- HomeKit settings;
- notes, voice recordings, photos and videos (videos up to two gigabytes in size!), created using the camera.
As you can see, it contains not the applications and media content themselves, but important information about them. This step is justified, since otherwise the backups would be obscenely large.
Does not contain:
- synced via iTunes: videos, photos, images and music from iPod;
- third party applications.
How to make a backup using iTunes?
Creating an iPhone backup using iTunes is a proven and most common method. In order to fully use this method, you must have a working iPhone, on the one hand, and, on the other, a personal computer running Windows or MacOS. The current version of iTunes must first be installed. You can download it on the official website of the manufacturer.
The procedure is as follows:
- First, launch iTunes, and then connect a pre-charged device (iPhone) to your computer via USB.
- After the program starts, you need to click on “Device” in the iTunes window that opens. And select a device from the list.
- After this, the program will open the “Browse” tab, where check the box next to “This PC”.
- If you want the backup to include data from the Health and Activity applications, you need to create an encrypted one. To do this, check the “Encrypt iPhone backup” option and set a password. The password must be easy to remember, because if lost, it will be impossible to restore the created backup copy.
- After this, click on virtual key"Create a copy now."

- During the backup creation procedure, it is strictly forbidden to disconnect devices from the PC, so as not to disrupt the process. It is worth noting that depending on the size of the data, the backup process can take quite a long time.
- When the process comes to its logical conclusion, you can check its success. To do this, on the “Browse” tab, you need to pay attention to the “Latest copies” item, which is located in the lower right corner of iTunes. The time and date the copy was created will be indicated there.
What to do if an error occurs: “iTunes could not create a backup because the iPhone is disconnected”?
Unfortunately, every user may encounter difficulties when creating a backup copy. Some of them are a lack of knowledge and experience, and the other are problems and malfunctions on the part of programs or equipment.
Sometimes users complain about the following error when backing up their smartphone: “iTunes could not create a backup because the iPhone is disconnected.”
In this case, it occurs even when the iPhone is connected via USB and is displayed correctly in the program. Since there is no code indicated in the error dialog box, we can assume that the problem is an interruption in the connection between the computer and the smartphone. Even if the connection between devices is disconnected for a fraction of a second, this will be quite enough to interrupt the backup operation.
The problem may be:
- use non-original cable Lightning;
- cable wear;
- a malfunction of the USB port on the computer, or problems with the Lightning connector.
There are a lot of solutions to the problem. First, you should purchase a new original cable and try again. If this does not help, you should use another computer or take the iPhone to a service center.
How to restore iPhone from backup?
Algorithm of actions aimed at iPhone recovery from a backup that was created using iTunes is similar to its creation and consists of:

What to do if an error occurs: “iTunes could not restore your iPhone because the backup copy is damaged”?
Some users who want to restore an iPhone from a backup using iTunes may encounter the error: “iTunes could not restore the iPhone because the backup was corrupt.” Although such a nuisance is quite rare, it can nevertheless confuse even the most advanced users.
The reasons why similar error became possible - a huge amount. Most often, these include incorrect creation of a backup copy, as well as a software or hardware failure during the backup process.
You can solve this problem in the following ways:
- Make sure that iTunes program installed correctly and has the current (currently) version.
- Update iOS version to the current one.
- Use third party programs to restore backup data.
If all of the above methods do not bring the desired effect, then in this case you should use another (possibly earlier) backup copy, an iCloud backup copy, or contact a service center.
Where does iTunes store iPhone and iPad backups on Windows and Mac computer?
Many users of Apple mobile devices are seriously concerned about the security and safety of personal data. The overwhelming number of such users try to regularly backup their iPhone and iPad.
Therefore, when buying a new one, modern computer or forced reinstallation of Windows OS, users are required to copy backup copies to external media. Without knowledge, this is not so easy to do, so you can often hear a question like: “In what directory does iTunes store iPhone and iPad backups on a personal computer under Windows control or Mac OS X?
Finding the treasured backup folder is quite difficult, since for each version of Windows and Mac computers the address of its location is significantly different.
Detect required iPhone backups and iPad users systems from Microsoft (Windows 7,8,10) can go to this directory (the AppData folder is hidden, to make it visible: 1. Open the control panel, then “Folder Options”, view, show hidden files and folders:
"\Users\(username)\AppData\Roaming\Apple Computer\MobileSync\Backup\".
As an alternative, you can do the following:
- To do this you need to find a search engine system line. For Windows 7 owners, click on the “Start” button; owners Windows versions 8/8.1 - click on the magnifying glass icon located in the upper right part of the desktop; in Windows 10 - just click on the search icon next to the “Start” key.
- In the search, enter the following text (without quotes): “%appdata%”.
- Press the “Enter” key.
- Double-click on three folders: “Apple Computer -> MobileSync -> Backup”.
- Ready.
Users of computers under Mac control OS X, to find backup files Only three steps are required:
- Click on the “Search (magnifying glass)” icon located in the menu bar.
- Enter the directory address (without quotes!): “~/Library/Application Support/MobileSync/Backup/”.
- Click on “Enter”.
To find a specific copy, Mac users need:
- Launch iTunes, go to settings.
- Select "Devices".
- Hold down the Ctrl key, click on the desired backup and select “Show in Finder.”
Using iCloud
Backing up your iPhone to iCloud is easy and convenient way, which is preferred by an increasing number of users. To do this you need to do the following:
- Charge your iPhone and then connect it via a stable WiFi connection.
- After this, you need to go to the “Settings” section -> [username], and then click on “iCloud”. If the version of iOS is 10.2 or earlier, then you should go to the “Settings” item and, scrolling to the very end of the page, select iCloud.
- After that, click on “Copy to iCloud”. If you are running iOS 10.2 (or earlier), then you should click on “Backup”, after making sure that the backup process in the iCloud cloud service is activated.
- Next, select “Create a backup copy” to launch the process of the same name. It is important that wireless network Wifi was on all the time.
To monitor the progress of the backup and make sure that the process completed correctly, just go to “> iCloud > “iCloud Backup” and find the “Create a backup” item, under which the date and time will be displayed.
How to restore an iPhone backup from iCloud storage?
Restoring a smartphone backup from iCloud is quite simple, if only because it does not require an update third party software and connecting the phone to a personal computer.
To do this, you need to carry out the following manipulations:
- Turn on the iPhone, after which a window should appear welcoming the developers. If the device has been previously configured, you should erase its contents. After this, begin to perform actions starting from the second point.
- Following the setup instructions, go to the “Programs and Data” item, then click on “Recover from iCloud copy”.
- After this, log in to cloud service by entering your Apple ID.
- Here you need to designate a suitable backup copy, based on the creation date and size. After selection, the data copying process will occur. It may be that the system will ask you to update to current version OS, so you will have to agree and follow the instructions.
- If prompted, you should log in to your account. Apple entry ID. This is necessary to restore applications and purchased content. If you have difficulty entering your password, you can easily skip the step.
- The recovery period can take from several minutes to a couple of hours, since it depends on the speed of the Internet connection, and, importantly, the size of the backup file. In this case, you cannot turn off the device.
- Once the setup is complete, depending on your data transfer speed, photos, music and other multimedia content will download in the background.
How to determine which iPhone or iPad the backup was created for?
Users who own multiple devices and frequently back up devices may encounter some difficulties. It's about the confusion when choosing the right backup to restore.
To correctly determine which iPhone or iPad a specific copy belongs to, do the following:

How to move iTunes backups to another drive in Windows and Mac OS X?
Storing files, including backups, on a local disk, which is a system disk, is risky and unreliable. In the event that the iTunes installation components are located on system disk, then it should be moved to a safe place, which is a separate HDD or local disk.
Owners of Windows 7/8/8.1/10 need to do the following to correctly transfer the backup file:

We launch the iTunes program in order to carry out the check by going to the “Devices” tab in the settings section.
Mac OS X owners need to:
- IN Dock Click on “Quit” iTunes.
- Using Finder, press the key combination “Shift+Cmd+G” and in the “Go to folder” field enter: “/Library/Application Support/MobileSync/” and then press “Enter”.
- The “Backup” folder must be copied to the desired disk.
- Launch a terminal into which to copy the information (without quotes!): “ln -s /Volumes/my_disk/Backup /Library/Application\ Support/MobileSync/”. Where instead of “my_disk” enter the desired disk with the copied backup.
- A shortcut will appear leading to the backup folder on the other drive.
- Launch iTunes and check for copies.
How to install a backup on another iPhone?
Installing a backup copy on a completely different iPhone may be required when purchasing a new model of an Apple smartphone. The procedure is completely similar to restoring from iCloud:
- First you need to turn on your iPhone.
- In the “Applications and Data” option in the “iCloud Backup” menu, you must select “Restore”. After this, you need to log into iCloud by entering your Apple ID.
- We select the desired file.
- We supervise the setup and installation.
How to delete old backups?
You can delete backup files if you no longer need them using iTunes as follows:
- For Mac: Launch iTunes and go to Settings. For PC (Windows): go to the “Edit” section and go to “Settings”.
- Select the "Devices" option.
- Select the specific file to be deleted.
- Click on the “Delete backup” button.
- Removal is complete.
Reading time: 21 minutes
Let's figure out how to backup an iPhone to iCloud with standard functionality and set everything up correctly. We will also consider third-party applications that will help create backups on a schedule.
This article is suitable for everyone iPhone models 11/Xs(r)/X/8/7/6 and Plus on iOS 13. Older versions may have different or missing menu options and hardware support listed in this article.
Why do backups on iPhone?
A backup copy consists of all the data from your gadget, which is stored encrypted in cloud storage or on your computer. A backup copy is necessary to restore any data previously available on the iPhone. Restoration may be needed in the following situations:
- Purchase new iPhone. A backup copy will allow you to quickly transfer all settings from the old device to the new one. All photos, applications and other content will be copied.
- Having problems with iOS. Doesn't always go smoothly iPhone update. In rare situations, the device simply does not turn on after the update and requires restoration. If you create a copy prematurely, then during the recovery process you can return all its data and functionality to the device.
- If your iPhone breaks or is lost. If you have a previously created backup copy, then all data can be restored to another device.
What is backed up?
In iCloud and iTunes, backups are created with the following content:
Ask your question to a specialist
Don’t know how to solve a problem with your gadget and need expert advice?
- Information about installed applications, their settings.
- Device settings.
- The order of applications, the appearance of the main screen.
- Story text messages and iMessage.
- Media library (video and photos).
- Health app data.
- HomeKit device settings.
- Purchase history from the iBooks Store, iTunes Store and App Store.
- Ringtones.
It is not the applications themselves that are included in the copy, but only their settings and information about them. Otherwise, backups would grow to large sizes.
Backing up iPhone to iCloud
This method involves creating a backup copy of data from an iPhone without using wires. The information will be stored on Apple servers and will be encrypted, so you don’t have to worry about the safety of your files.
Backing up your iPhone to iCloud may not be a suitable solution for everyone. Only 5GB is available for free on iCloud. If a larger data size is saved to the backup, then operating system will display a warning that a copy cannot be created.
To create an iCloud backup of your iPhone, you must have an active connection to Wi-Fi networks. We follow the instructions:
Similar simple method The iPhone backup function to iCloud is launched. The process of creating a copy of iOS will begin only if the device is charging, locked and.
Manually backing up iPhone to iCloud
- On your iPhone, go to the Settings menu, select iCloud and Backup.
- Click on “Create a backup” at the bottom of the page. The creation of a copy will begin immediately.

Increase
iOS does not provide any notifications about the successful creation of a backup copy of the gadget. You can verify the success of the operation by going to the “Settings” menu, then “iCloud” and “Backup”. It displays information about how much time remains until the copy is completed, if the process is still running.

Increase
Backing up your iPhone in iTunes
When you create an iPhone backup in iTunes, its size is limited only by the capacity of your computer's storage. If your gadget contains a lot of data, for example, entire collections of videos and photos, then you should back it up through iTunes.
We perform the following actions:

From the instructions above, you can see that the process of creating a backup copy in iTunes is no different. In addition to iTunes, you can create a backup using various third-party applications.
Creating an iPhone backup using third-party applications
This function is offered by many modern Apple devices, but almost all of them are paid. Among free utilities iTools and Tenorshare iCareFone can be highlighted.
Why in third party applications back up iPhone? There is no particular need to use them. Some users want to provide additional security for important files, for example, memorable photos or videos. Suitable for these purposes alternative methods creating backups.
iTools

You can first specify the folder where the backup will be saved. To do this, select “Change”.

Increase
Once the backup process is complete, you can check the results. Unlike iTunes and iCloud, this utility files are not encrypted in a special way. This allows you to access photos without using additional software.
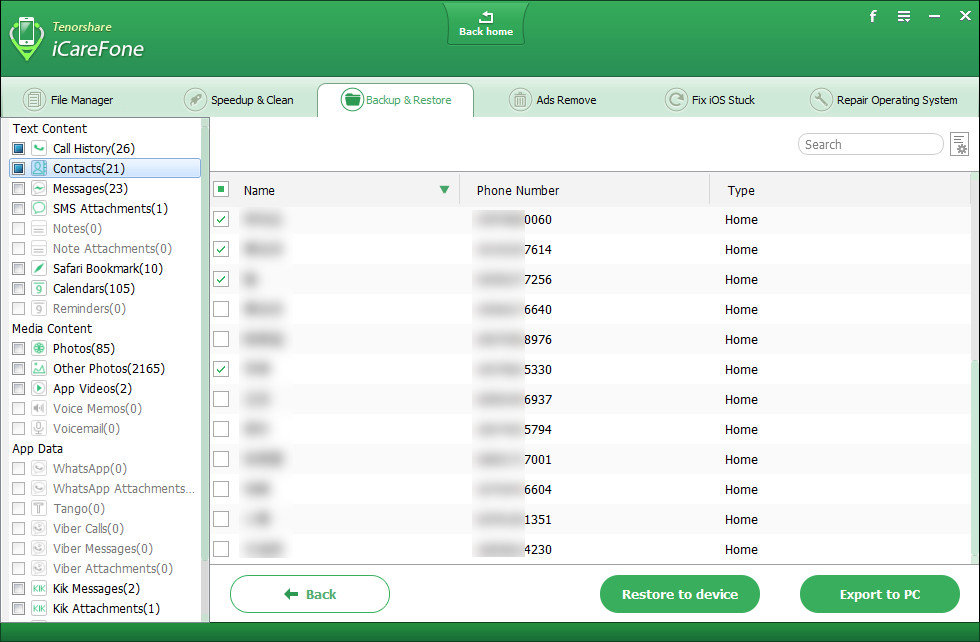
Tenorshare iCareFone
This tool It features wide functionality for optimizing iOS devices. Using the application, you can use deep or quick search, delete all unnecessary files on the gadget, block banners and advertising in programs, fix system problems after an overload, update, etc.
The utility also backs up, manages and restores system data without access to iTunes. The main advantage of Tenorshare iCareFone is that you can take a backup whenever you want. After this, you can restore data from the backup.
Instructions:

Increase
Using the Tenorshare iCareFone utility, the process of restoring from a backup is impressively fast and versatile. The application can also be used to restore previously created backups in iTunes.
Tonight Apple will roll out a “stable” version of iOS 12, which promises to speed up the interface even on older devices like the iPhone SE. If you are still afraid to install a new version of iOS because of minor bugs, but want to try before the release, then you can roll back to iOS 11.
First of all, be sure to back up your device. This can be done in two ways.
Backup to iTunes
Connect your iOS device to your computer and select it in iTunes:
Turn off Find My iPhone and click on the Back Up Now button, and all stored files on your device will be copied to your computer. This may take a few minutes.
iCloud backup
You can make a backup without a computer via iCloud. Go to iCloud settings and find the “Backup” option there. Go into it and turn on the backup - now while charging and with good internet The iPhone itself will create new backups and delete old ones.
Installing iOS 12
Bringing back iOS 11
When you have saved all your data, you can start returning iOS 11. To do this, you need to connect the device to the computer and turn it off. Then hold down the volume down and power buttons - after 10 seconds, release the power button, and continue pressing the volume until the iTunes icon appears on the iPhone screen. If you have an iPhone younger than the seventh, then instead of the volume button you need to press “Home”.

After this, iTunes will immediately see that your iPhone is in recovery mode and will offer to install the latest version of the OS, resetting all settings and deleting files.

Click on the "Restore and Update" button, read about the cool changes in iOS 11.4 and restore your device. It took me about 20 minutes.

When the iPhone turns on, iTunes will see it again and offer to select one of the previously created copies of the device. Choose one of them, and all your data and applications will return to their places with iOS 11.

The same can be done without iTunes. Once the iOS 11 restore is complete, the first time you set it up, you'll be prompted to restore the latest copy from iCloud, if you still have one.
Please note that after the official release of iOS 12, this method will no longer work. If you try to get back iOS 11 this way, you won’t succeed. However, if you disable automatic update, then you will be able to sit on the old version operating systems.