How to create a shared network. Local network - what is it? How to create and configure a local network
Local network is computer network, which serves users of multiple computers on a short distance from each other. It is very convenient for use in the office and at home. So, for example, if there are two computers at home, then setting up a local network between them will allow you to transfer information from one computer to another via working folder without a flash drive or disk, and also use one Internet connection and play games over the network. The savings and convenience will be obvious, the main thing is to understand how to set up local network. We will look at this issue in relation to Windows XP and Windows 7.
Will need:
- two computers;
- two network cards;
- Network cable for connecting computers, crimped with RJ-45 connectors, also known as patch cord;
- Switch - required if more than two computers will be used to create a network.
How to set up a local network in Windows XP
- First, install network cards in computers (usually PCI connectors are used for this) and drivers for them.
- The next step is setting up network cards on computers. You must perform the following actions as an administrator. Go to settings network connections: Start - Control Panel - Network Connections. Then click right click mouse on “Local Area Connection” and select “Properties”. Now you will need “TCP/IP Internet Protocol”, then click on “Properties”. A window will appear in front of you, you need to indicate the following information: IP address: 192.168.1.X, on computers they put the numbers in order from 1 (1 - the first computer, 2 - the second computer). Enter the required numbers on each computer. The subnet mask should look like this: 255.255.255.0
- Now we need to ensure that computers have access to each other. In “Network Neighborhood”, specify the same name for both computers working group. To do this, right-click on “My Computer” and select “Properties”. The “System Properties” window will appear in front of you. Select "Computer Name", click "Change", set the same names for the workgroup, but make sure that the computer names are different. Then you need to confirm the changes (“Ok”) and restart the computers. After a reboot they will be on the same network.
- Now all that remains is to create a connection between computers using a patch cord.
- We looked at how to set up a local network connection in Windows XP. To check the connection on the first computer, click “Start” - “Run” and enter “ping 192.168.1.2 -t”. If you see the lines “Response from...” repeated, it means the network is working.
How to set up a local network in Windows 7
Windows 7 is a very popular operating system these days, so the question of how to set up a local network in it worries many. So, let's begin!
Check your workgroup settings first because Windows 7 computers can find each other as long as they have the same workgroup name. The default workgroup name is “Workgroup”. If the names of the working groups do not match, then this needs to be corrected by giving them the same names.
- Open the following: Start - My Computer - Properties. Find "Computer Name" and change the workgroup name if necessary. To change, you need to select “Change”; here you can enter any computer name.
- Provided that the network cable has been connected before Windows installations 7, the network must identify itself. If it is not found, then try restarting the computer. If after this the network is not found, you will have to install it manually. In subsequent paragraphs we will look at how to do this.
- Go to “Network Connection”, find “Network and Internet”, then “Network Center” and “View task and network status”.
- Select the network card, right-click on its network card icon and select Properties.
- A window will appear in front of you, click on “Internet Protocol version four (TCP/IP v4)”. Next, a window will open, as in Windows XP, where you need to set all the necessary settings. The IP address and subnet mask are configured in the same way as in Windows XP.
Here's how to set up a computer-to-computer local network in Windows system 7.
The need to create a local network arises when you want to connect more than two computers. A local network is needed to work together with shared files, with one printer, scanner, etc. In this article we will take a detailed look at creating a local network.
How to create a local network?
Materials and tools:
- Tester
- Roulette
Technology for creating a local network
Prepare a diagram that will show where all the computers, switch and server for your future local network are located.
Measure the distance between the computer and the power outlet or switch.
Prepare patch cords of the appropriate length for each computer.
Connect the computer and the power outlet using the prepared patch cord. Each computer has a connector specifically designed for a patch cord.
Turn on your computer.
Once the computer turns on, you will see the LED next to the connector turn either green or orange. This means the patch cord is connected correctly.
Repeat similar connection steps for the remaining computers on the future local network.
So, you have completed connecting the computers. But the creation of a local network is just beginning. In order for computers to “see” each other, each computer must be configured programmatically. For example, we will use a peer-to-peer network, i.e. "working group".
Proceed to setting up your network card. Start - Settings - Control Panel - Network Connections - Local Area Connections.
Click on the “Local Area Connection” icon with the right mouse button. A menu will appear.
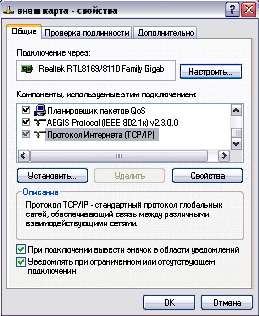
Select "properties". A settings window will appear.
Select the “Internet Protocol TCP\IP” component and click on the “properties” button.
Check the “Use the following address” checkbox.
Dial the IP address (192.168.0.100). The subnet mask will be set automatically and will look like this: (255.255.255.0).
Click on the "OK" button.
Click "OK" again.
All you have to do is enter your computer into the peer-to-peer network. Go to settings. Start - Settings - Control Panel - System - “Computer name” tab - “change” button.
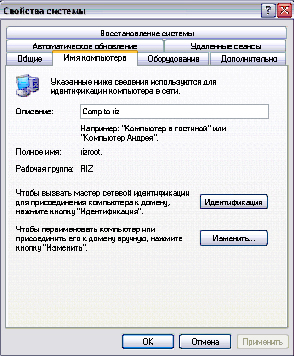
Enter the computer name (required in Latin letters, only letters and numbers can be used).
Check the “is a member of the working group” checkbox.
Come up with a name for the working group and enter it in Latin in the working group name field.
Click on the "OK" button.
Click "OK" again. The system will prompt you to reboot for the changes to take effect.
Agree and reboot.
Congratulations, you have added your first computer to your workgroup. To create a local network, carry out similar operations for the remaining computers, choosing for each of them a unique name, a different IP address from the others (i.e. 192.168.0.100 - 192.168.0...).
Important: In the settings of each computer on the local network, you must specify the same workgroup name.
The creation of the local network is completed.
Today you won’t surprise anyone with the presence of 2 personal computers in the same house. And if there are two computers in the same house, then they should be connected to each other via a local network for quick and comfortable access.
And if you own two personal computers running the system, create a local network for them. In this article you will learn with a clear example set up local network on Windows 7 between several computers or laptops.
Setting up a Windows 7 local network between two PCs
Before directly connecting a PC via a local network, you need to have network cards on two PCs. IN modern computers the network card is already built into motherboards, and even more so in laptops. You also need two network cables, the ends of which must be crimped according to the “computer - router” scheme.
The presence of two cables and a router is necessary for the normal functioning of the local network and PC home group. After all, if you simply connect two computers directly with one cable, the network you create will be unidentified after a reboot.
Before you start creating and , you need to make sure you have the necessary drivers for your network cards on your PCs. If the drivers are already installed, start connecting cables to the PC and router. Now just wait until the connection identification is completed.
Now you need to decide which of the two computers will be the main one. Now on the main computer go to Control Panel - Network and Internet - Network and Sharing Center and shared access.
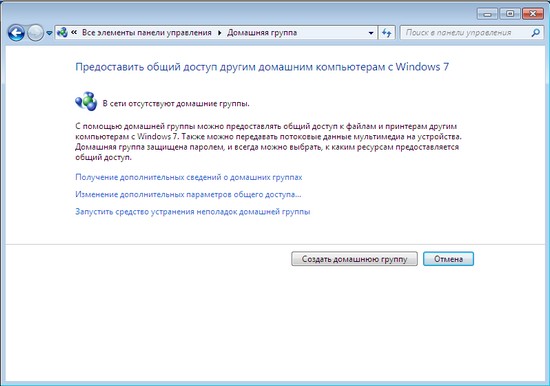
yours new network will automatically be assigned public status. You need to change your status to Home. To do this, you need to click “Homegroup” and in the lower left corner go to the page where you will see that the system was unable to connect your computer to home group. Click "What is Network Location?"
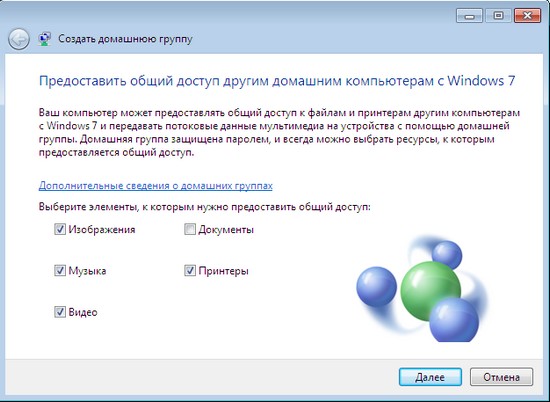
Here select “Home Network” and wait until you connect to the network and apply the new settings. Next, you need to select the elements to which you want to provide access from the second PC. Click “Next”. Write down the system-generated password and click “Finish”.
Now the “Change HomeGroup Settings” window will open in front of you, where you need to go to “Change advanced sharing settings”.
Expand “Home or work” and set the position of all markers to the first item.
Congratulations, you have created a homegroup on the main PC, now you need to connect the second computer to the group.
Connecting a 2nd PC to a homegroup
On the 2nd computer, you need to go to the “Network and Sharing Center” and click “HomeGroup”:
Congratulations, yours home network ready. You can check the health of your network by going to the Network Control Center, where you will see a message stating that your network has home status.
If something goes wrong, you need to contact a specialized service.
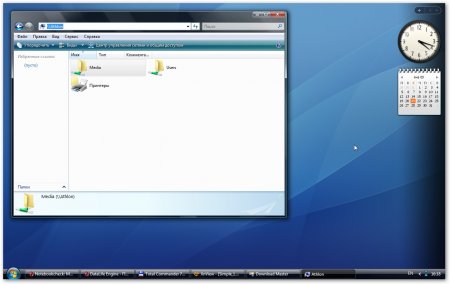
Now for quick access from the first PC to the second, you need to open “Homegroup” or “Network” in the start menu, where you can see the names of your PCs that are connected to your personal homegroup. When you go to images on this PC, you will have access to shared folders.
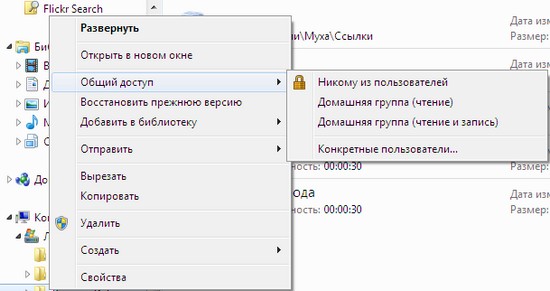
In order to share any folder with another PC, you need to go to the context menu of the required folder and in the Sharing tab activate the “Share” checkbox. By the way, are you aware that the release date for Windows 9 is already known? We will definitely tell you how to set up a local network on a new operating system when you already have it installed.
The problem often arises, how to transfer files from one computer to another? You can use various flash drives, disks, etc., but the most convenient and in a fast way is the creation of a network.
Let's look at how to quickly create a network between two computers using Windows XP and Windows Vista/7. There is no difference in setup between a computer and a laptop.
To organize file sharing, you must first create a network between devices, and then set up sharing.
To transfer files, the most convenient and fastest way is to connect using a network cable. Network cables RJ45 for creating a network can be direct or Crossover.
We need a crossover cable. You can buy it in a store or make it yourself. It is easy to distinguish the desired cable if you put the ends of one cable together, then the color markings inside the connector of the crossover cable should not match.

It is worth noting that modern network cards are able to automatically detect the type of cable and adapt to it. In other words, if you don't have a crossover cable, you can use a straight cable. With a high degree of probability the network will work.
If for some reason using a wired network is impossible, you can create wireless Wi-Fi. The procedure for setting up access is similar.
When we have taken out the RJ45 cable, connect it to the network connectors. If everything is in order, the green lights near the connector should light up.

If your lights do not light up, then proceed as follows:
1) Check whether there are any lights at all and whether the devices are turned on
2) Check whether the interfaces are enabled in Network Connections
3) Check the cable. We pay attention to the order in which the wiring in the connector goes and whether the RJ45 cable itself is damaged.
Setting up a network between two computers.
Setting up a network in Windows XP
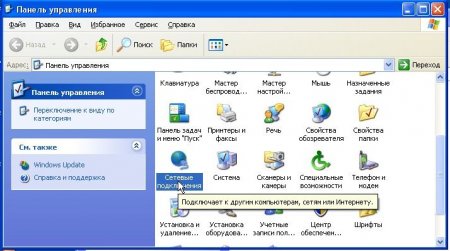
Go to Control Panel -> Network Connections
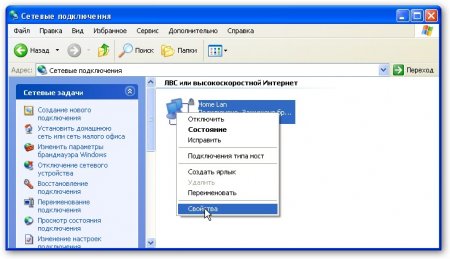
Click on Connect to local network. Notice that the connection says Connected. Right-click and click on Properties.
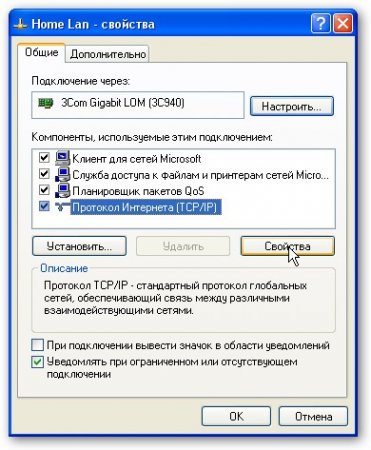
Select Internet Protocol (TCP/IP) and click on Properties
Click OK. Network setup on one device (PC or laptop) is complete.
Let's look at how the network will be configured in Windows Vista/7.
Network setup in Windows Vista/7
Go to Control Panel -> Network and Sharing Center -> Manage network connections.

Right-click on the local network connection and go to Properties:


We indicate the IP address. You can specify any of the range 192.168.xxx.xxx. The main thing is that they do not repeat on two computers. That is, if on one it is 192.168.1.1, then on the other it is 192.168.1.2. If on one it is 192.168.100.10, then on the second it is 192.168.100.20.
It should look something like this:

Now let's go to the Network and Sharing Center and look at our network. It must be private. If it is not, then click on Settings.


Click Close:
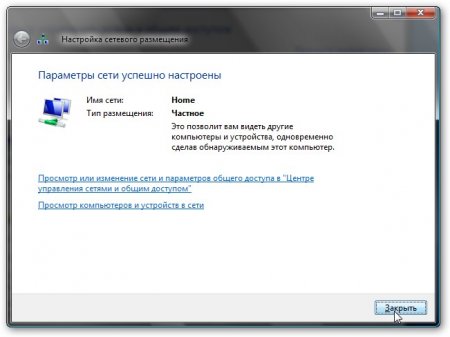

That's all. We are done with setting up the network on Vista/7. Now let's move on to setting up Sharing.
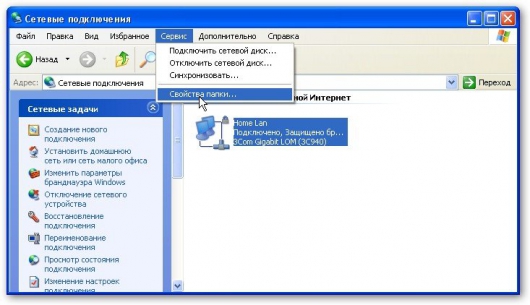
Setting up sharing in Windows XP
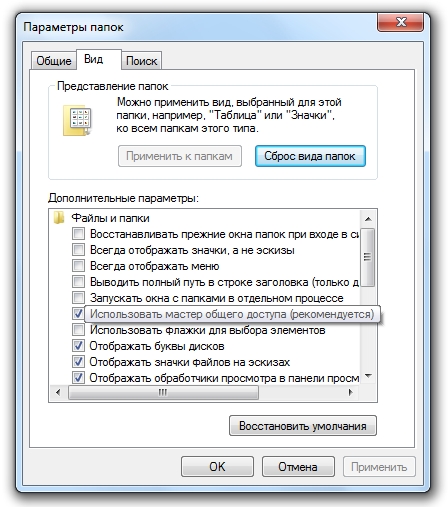
First, go to Tools -> Folder Options:
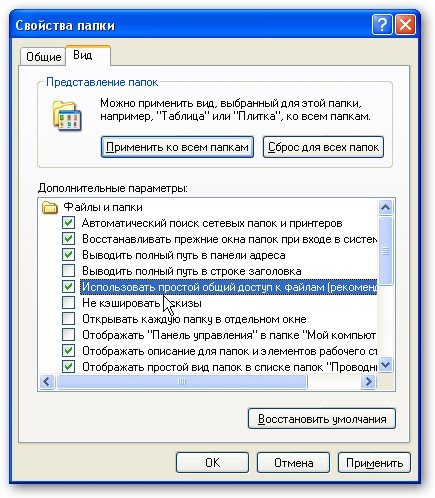
On the View tab, enable simple file sharing:

Click the Change button on the Computer name tab and enter the name of the workgroup.
Two computers on the network must have the same Workgroup name.
On the same tab you can specify the name of the computer on the network.

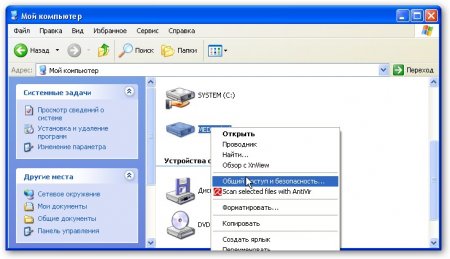
Now go to My Computer and click on the folder that you want to provide access to from the network, and select Sharing and Security from the menu... In my example, I open general access to the entire D:\ partition, that is, it will be displayed on another computer the entire D:\ partition of the first one (on which access was opened)
Click on the warning:
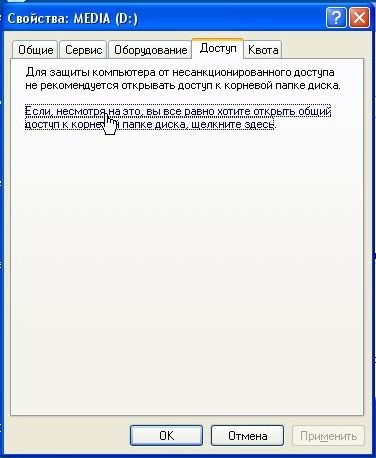
We indicate the name of the shared resource and allow (or not allow) modification of files over the network:

That's all...
Setting up sharing in Windows 7
First of all, go to Control Panel -> Folder Options and check the box:

Click on Change:

Enter the name of the computer and workgroup. The Workgroup name must be the same on all computers on the network:

Now go to Computer and click on the folder that you want to provide access to from the network, and select Sharing from the menu... In my example, I share the entire D:\ partition, that is, on another computer the entire D partition will be displayed :\ first (where access was opened)
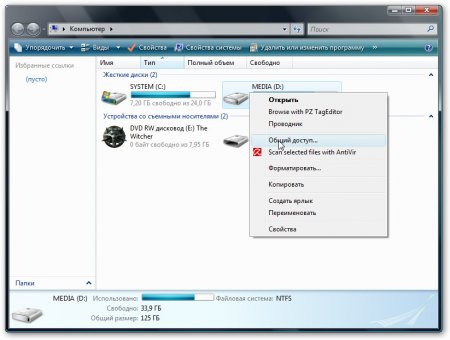
Click on Advanced access settings:
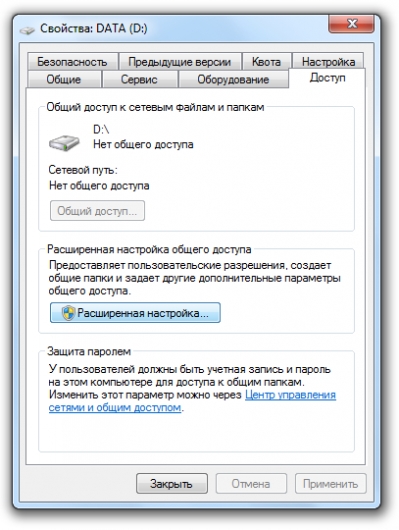
Specify the name of the share and click on Permissions.

On this tab we can specify which users will be able to open and change files on this computer from the network:

This is what it should look like:

We are done with sharing on Windows Vista/7.
How to access shared resources on another computer
Once you have set up the network and file sharing, you can already transfer files from one computer to another.
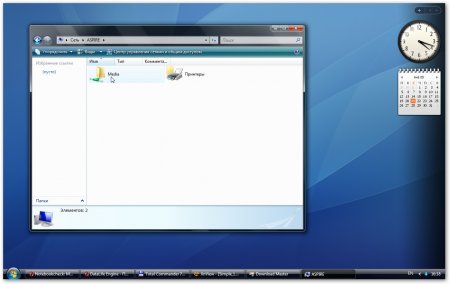
To do this, open Computer and enter \\computer_name\ in the address bar. For example: \\ASPIRE\ or \\Athlon\. You can also use Network Neighborhood or Network. If this does not work, then you can enter the IP address of another computer on the network:
If you need to constantly work with shared files that are located on another computer, then right-click on the shared folder and select Map network drive. In this case, the folder with files on another computer will appear as a partition (disk)
Connection via router
We organized the simplest network between two computers. If you need to connect more than two PCs to the network, you should buy a router from the store. A router connects several PCs to a network and allows you to use one Internet connection for all computers.
To connect the router we use a straight RJ45 cable, not a cross cable.

The router connects to the Internet via a WAN connector. The remaining connectors on the rear wall are LAN; we connect each PC1-2-3-PC4 to them separately with a straight RJ45 cable:

Setting up routers is described in detail in the model manufacturer's manual.
The general steps are as follows:
1. In the WAN parameters we indicate the data from the InterZet provider agreement - static IP type.
2. In the LAN parameters, select the dynamic IP type, that is, each connected PC will automatically be assigned an address.

3. Set up Windows XP/Vista/7, as already described above.
Select Internet Protocol version 4 (TCP/IP) and click on Properties:


Select Obtain an IP address automatically and click OK.
We repeat the remaining sharing settings for the selected Windows.
Solving possible problems
If you are unable to access files on another computer, then you need to do the following:
1) See if the network connection is working, if the lights are on.
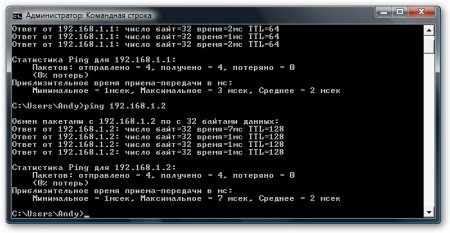
2) Launch Command line and enter the command ping the IP address of another computer on the network. For example, ping 192.168.1.1.
If you have pings (0% loss), then you need to check the sharing settings, otherwise check the network connection and firewall settings.