How to open access to the server. How to log in using an external IP address from the local network for MikroTik
Attention! You should be careful when remotely creating rules for blocking access to a server via IP! Don't accidentally block yourself ;-)
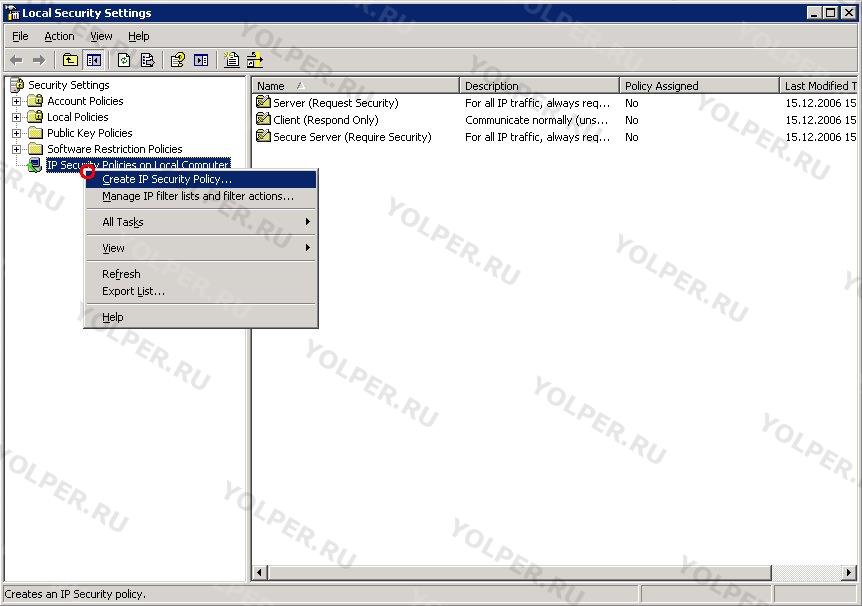
Open the management section local politics security ( Local Security Policy). To do this, click menu Start => Administrative Tools => Local Security Policy.
In the window that appears, right-click on the branch "IP Security Policy on local computer» (IP Security Polices On Local Computer). From the context menu, select "Add Security Policy" (Create Security Policy).
The Create New Security Policy Wizard will launch. Click "Further" (Next).
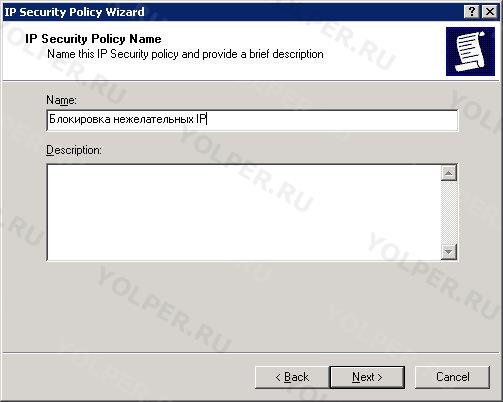
In the next step, enter the name of the new policy. For example "Blocking unwanted IP addresses". Description is optional. Click "Further" (Next).
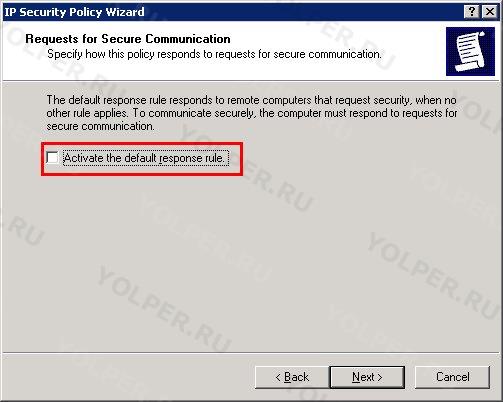
Then remove option "Activate default rule" (Activate the default response rule) and press "Further" (Next).
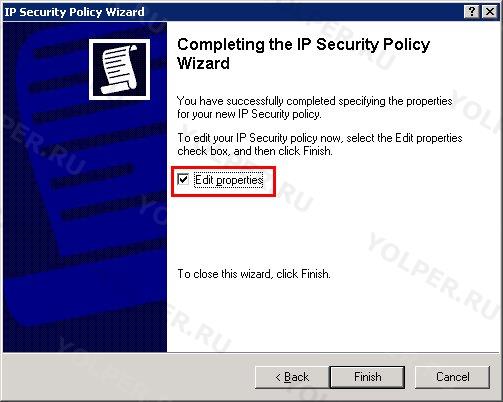
On last step leave everything as it is and click on the button "Ready" (Finish).
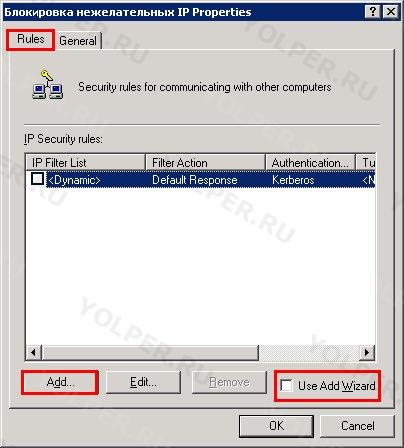
The properties window for the created policy will open. On the tab "Rules" (Rules), uncheck the option "Use Wizard" (Use Add Wizard) and click on the button "Add" (Add).
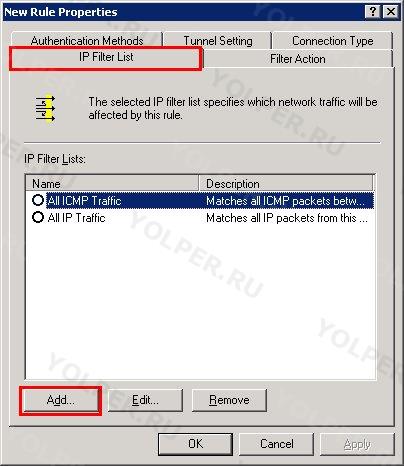
A window will appear "New rule parameters" (New Rule Properties). On the tab "IP Address Filter" (IP Filter List) click on the button "Add" (Add).
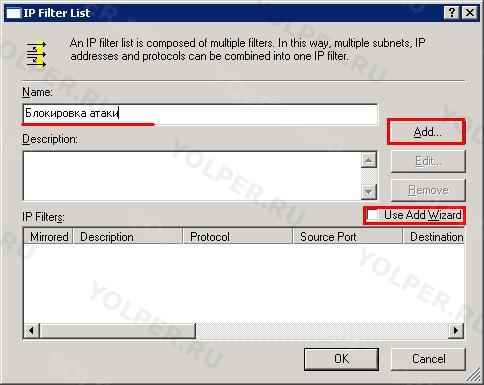
In the window that appears, in the field "Name" (Name) Enter the name of the group of IP addresses to block. For example: "Block Attack". Uncheck the option "Use Wizard" (Use Add Wizard) and click on the button "Add" (Add).
In the IP filter properties window, on the tab "Addresses" (Addresses) In chapter "Source" (Source address) leave "My IP address" (My IP Address).
In chapter "Destination" (Destination address) select "Specific IP address" (A specific IP Address) or "Subnet" (A specific IP Subnet) and specify the IP address(es) that you want to deny access to the server.
Option "Mirror" (Mirrored) leave it on.
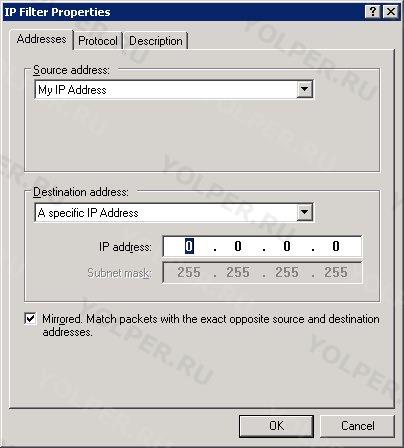
On the tab "Protocol" (Protocol) you can select the protocol for which the filter will apply. By default, the filter will be used for all protocols.
![]()
On the tab "Description" (Description) you can specify a description of the filter. This description will be used in the filter list to make it easier for you to find the filter later. It is best to specify the IP address to be blocked as a description.
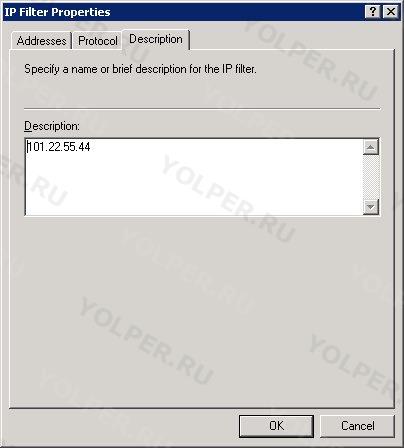
Click on the button "Ok" to create a filter. You'll be back out the window "List of IP filters" (IP Filter List), in which the newly created filter will appear.
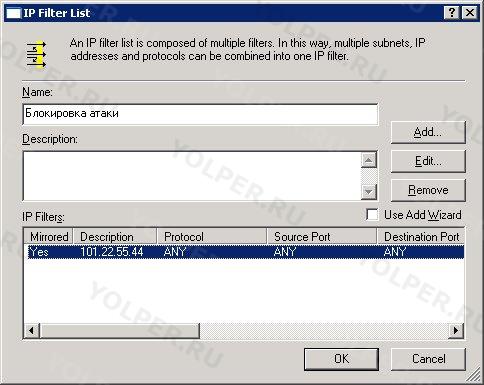
Click on the button "Ok" to close the list of IP filters. You'll be back out the window "New rule parameters" (New Rule Properties). The newly created list will appear in the list of IP filter lists. Select it.
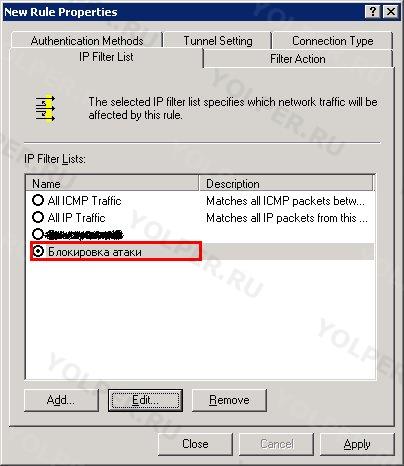
Go to the tab "Actions" (Filter Action). Uncheck the option "Use Wizard" (Use Add Wizard) and click on the button "Add" (Add).
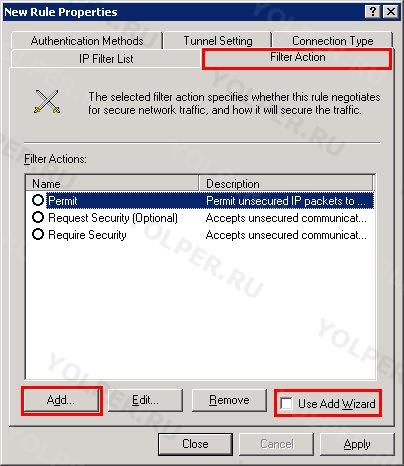
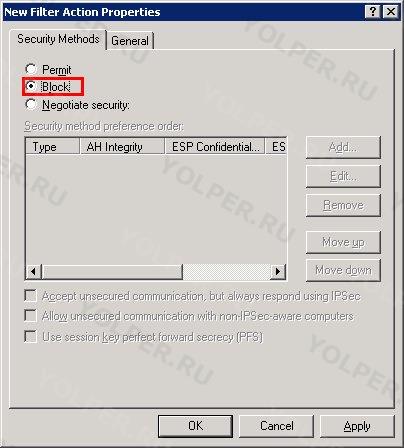
In the window that appears, on the tab "Protection" (Security Methods) set the option "Block" (Block).
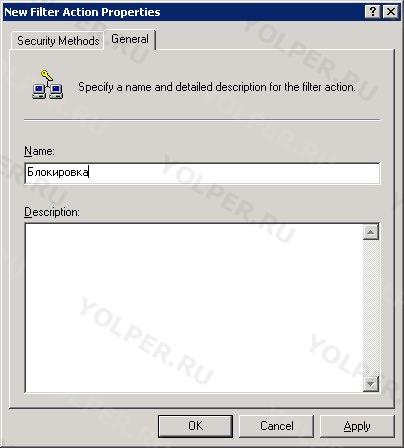
Go to the tab "General" (General) and in the field "Name" (Name) specify the name of the action. For example: "Block".
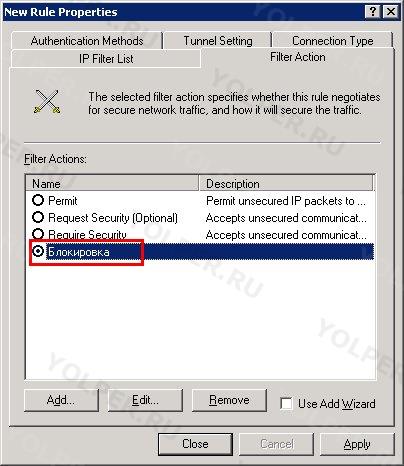
Click on the button "Ok". The newly created action appears in the list of actions. Select it.
Click on the button "Ok".
That's it, the policy has been created. To activate it, right-click on the policy name and select from the context menu "Activate" (Assign).
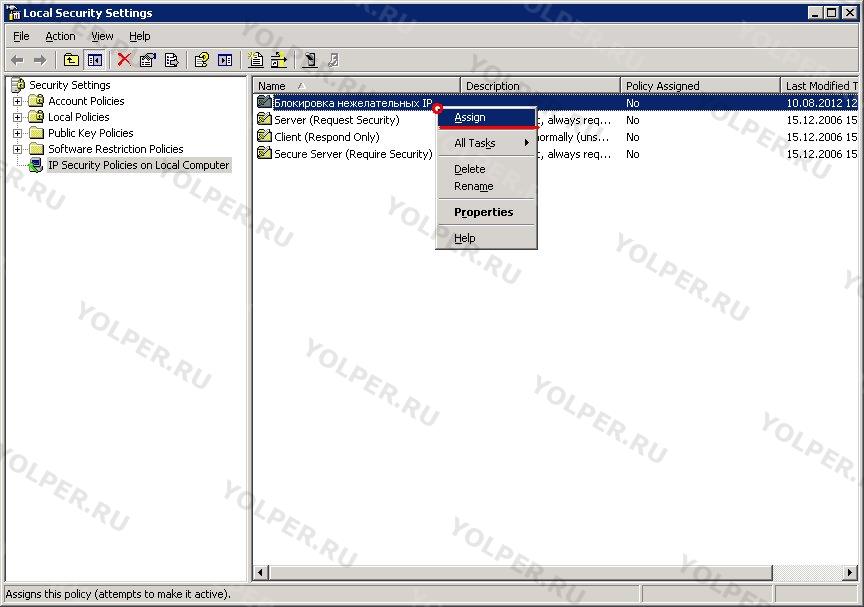
Similarly, through the context menu, you can disable the created policy.
You can easily add unwanted ones to the properties of the created policy. IP addresses.
You can connect your computer to the server via the Internet using a VPN (Virtual Private Network). This will allow you to correctly distribute the resources of the remote network, as well as configure the server in the correct order.
Instructions
The procedure for opening access to the server involves providing access to a selected network folder, or sharing the folder. The problem is being solved standard means Windows OS and does not require any additional software. In this case, we are considering Windows Server 2003.
Instructions
Call the main system menu by clicking the “Start” button and go to “All programs. Expand the "Standard" link and launch the application " Windows Explorer" Find the folder you want to grant access to and call its context menu by clicking right button mice. Select "Properties" and apply the checkbox in the "Open" line general access to this folder" in the dialog box that opens.
Type the desired name for the one you are creating. network resource in the "Share" line and apply the checkbox in the "Maximum Possible" line of the "User Limit" section. Click the "Permissions" button to add users who can access the selected folder and use the "Add" command. Select the desired user from the list in the new dialog box and use the checkbox to define access rights:
Full access;
- change;
- reading.
Confirm your choice by clicking OK.
Please note that you can make advanced settings for access rights permissions when you click the “Advanced” button. Uncheck the "Allow inheritance..." line, since otherwise the selected user will receive rights from a higher level (usually from a disk where everyone is set to "Read Only" by default). Apply the checkbox in the “Replace permissions” line and confirm saving the changes made by clicking the “Apply” button. It should be borne in mind that the time that the process of allocating rights may take depends not on the size, but on the number of files in the folder. Therefore, it can take quite a long period of time. Wait for the process to complete and repeat the above procedure for each user or group of users who need to be granted access to the server.
Only a few users know that it is possible to set up a home local network in such a way that all computers included in it have access to the Internet without purchasing expensive equipment.

You will need
- - LAN card;
- - network cable.
Instructions
First, select a computer that will be directly connected to the Internet. In this case, it is installed operating system Windows Vista. If this computer has only one network adapter, purchase a second network card. It will be needed to connect two computers to a local network.
Purchase a network cable of the required length. Connect with each other using it network cards both computers. Connect the provider cable to the second network adapter of the selected computer. In this case, the method of gaining access to the Internet (via a LAN port or DSL modem) is completely unimportant.
Turn on the first computer. Open the list of available network connections. Select the network adapter that is connected to the other computer. Open its properties. Select "Internet Protocol TCP/IPv4". Click the Properties button. Highlight the "Use the following IP address" option. Set the IP value for this network adapter, equal to 25.25.25.1.
Set up an Internet connection if this operation has not already been performed. Go to the properties of this connection. Select the Access tab. Find the option “Allow computers to use this Internet connection.” local network" Specify the network that your two computers form. Save your settings.
Turn on the second computer. Open the list of available network connections. Go to TCP/IPv4 protocol properties. If the second computer is running Windows XP, then you need the TCP/IP protocol.
Activate the “Use the following IP address” option. Enter its value equal to 25.25.25.5. Press the Tab key to automatically obtain the subnet mask. Find the "Default Gateway" and "Preferred DNS Server" options. Fill them with the IP address of the first computer. Save your network settings.
Let's say you configured it, and everything works fine from the external network. But sometimes it may be necessary to organize access to a computer or server using an external IP address not only from the outside, but also from the local network. In this case, the so-called Hairpin NAT or NAT LoopBack is used - sending and receiving packets through the same router interface, changing addresses from local to external and vice versa. Let's look at the necessary settings.
Let's say we have:
- Router with external IP (WAN IP) 1.1.1.1.
- A computer with a local address 192.168.88.229, and a server, application, etc. running on it for access from an external network. In our case, port 8080 is used for connection.
- A computer on the local network with the address 192.168.88.110.
We already have a configured forwarding rule for port 8080:


But it will not work when accessed from LAN, since the settings are focused on packets from the external network, via the WAN port. Therefore, we need to specify 2 more rules.
Setting up access from the local network using an external IP address
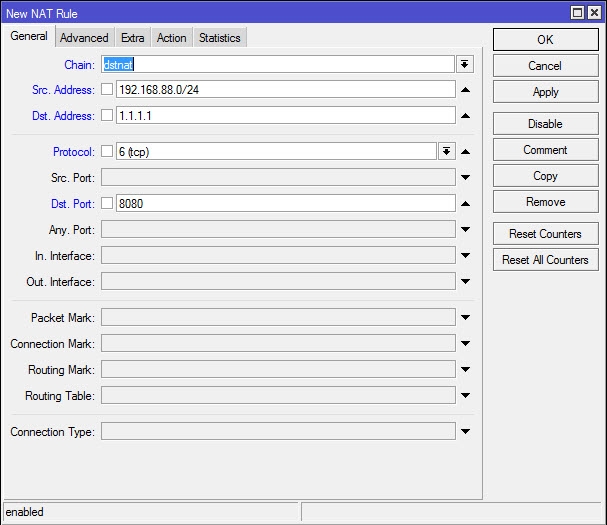
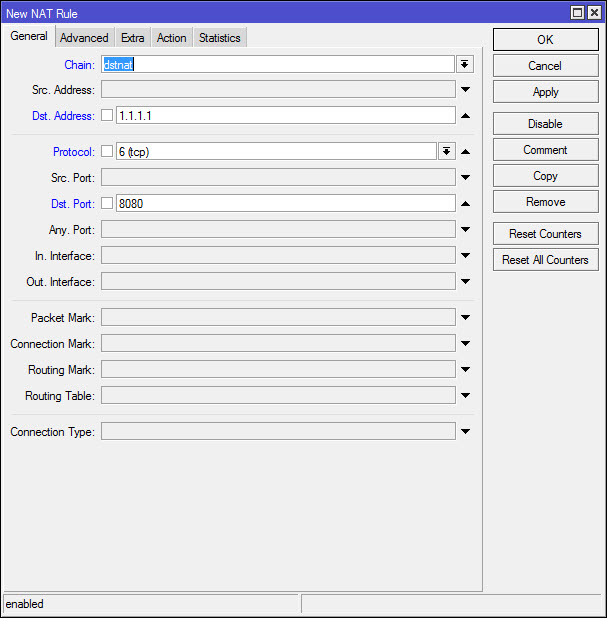
1. Create a rule to redirect requests via external IP from the local network.
General tab.
Chain- dstnat.
Src. Address- write here the local address of the computer from which we will access via external IP, or a range of addresses if such access needs to be provided to several computers on the network.
Dst. Address- indicate the external address of the computer/server, etc., which will be used to access from the local area.
Protocol, Dst. Port- here we specify the port and protocol parameters that correspond to our connection (the same as in port forwarding).
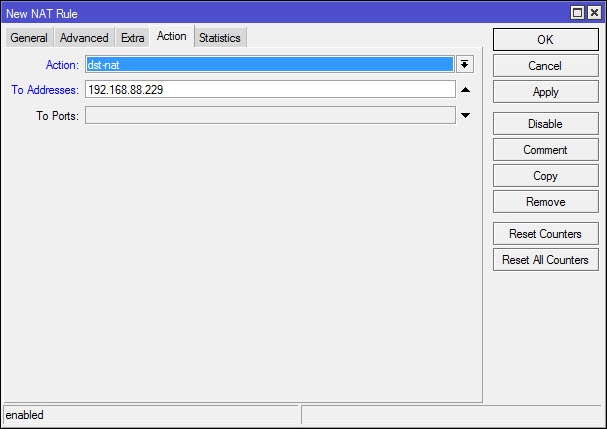
Action tab.
To Addresses- indicate the local address of our server, the computer that we access using the external IP address.
To Ports - The port is the same as on the previous tab, so you don’t have to specify anything here.
Now you can log into computer 192.168.88.229from local networkby external IP address 1.1.1.1.
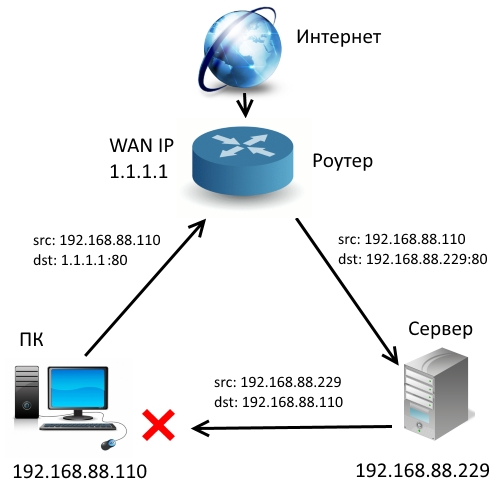
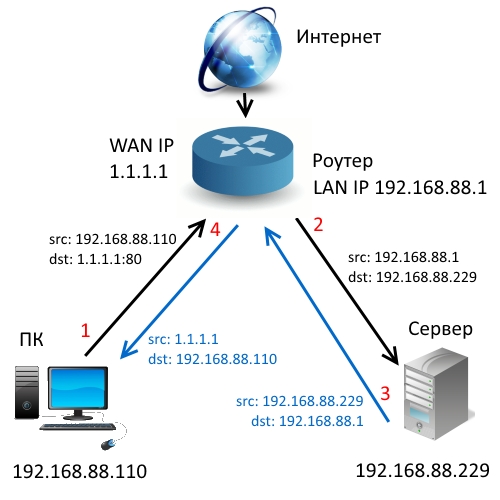
But if you try to interact with him in some way, nothing will work. Why? Let's see what happens.
- Our computer (192.168.88.110) sends a packet to the external address of the server, which is also the address of the router, respectively - 1.1.1.1.
- The router faithfully redirects it according to our dst-nat rule to a computer with the address 192.168.88.229.
- He accepts it and sends a response. But since it sees a local IP address as the source address (after all, the packet came from a computer on the local network), it sends the response not to the router, but directly to the recipient.
- The recipient (192.168.88.10) sends data via external IP, and also expects a response from the external IP. Having received a packet from local 192.168.88.229, it simply discards it as unnecessary.
Therefore, we need one more rule that will replace the local source address when sending a packet to an external IP.
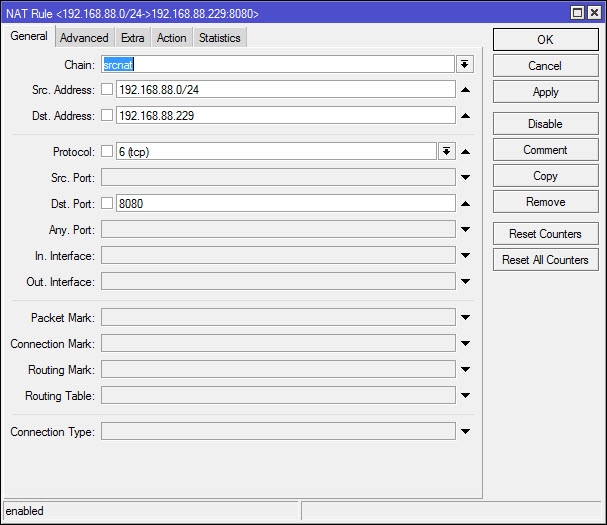
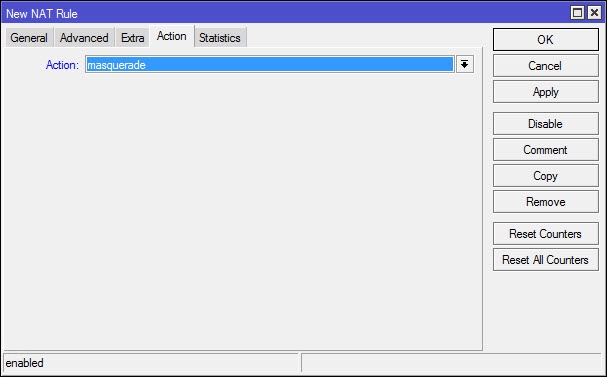
2. Replace the local computer address with an external IP address.
On the Action tab, set masquerading, i.e. replacing the source address with the local address of the router.
On the General tab we specify the rules under which it will be applied:
Chain- srcnat, i.e. for requests from the local network.
Src. Address- write here the local address of the computer, or the range of addresses from which packets will be sent.
Dst. Address- here we specify the “recipient address”, i.e. the rule will apply only to packets addressed to our server.
Protocol, Dst. Port- here we specify the same port and protocol parameters.
Now, having received a packet from the local network addressed to external IP 1.1.1.1, the router will not only redirect it to 192.168.88.229 (according to the first rule), but will also replace the source address (192.168.88.110) in the packet with its local address.
The response from the server will therefore not be sent directly to the local network, but to the router, which in turn will forward it to the source.
Second method Hairpin NAT MikroTik: 2 rules instead of 3
You can make it even simpler by replacing the port forwarding rule with the first Hairpin NAT rule. In this case, you do not need to specify In in the settings. Interface and Src Address, but you need to specify the destination address.
Access to the external IP address of your server or computer with the application will be open both for calls from outside and from the local network, from any addresses, but only for packets with the destination address 1.1.1.1:80.
Now add the srcnat rule described above, and that’s it. You can add additional filtering by specifying in the out-interface the interface from which packets will be sent, if necessary.
The only disadvantage of Hairpin NAT is that the load on the router increases, because those calls that previously passed through the local network directly between computers will now go through the router.
The second method is simpler, but depending on your network configuration, the first method can also be used.
UPD: we tested the configuration methods outlined in this article again using the example. as well as the setting suggested in the comments. They are all workers.
website