Local connection of two computers. How to connect two personal computers over a network directly
Hi all! In today's article you will learn how to create a local network between two computers.
Nowadays, it is not surprising when there are two PCs in the house. But ten years ago, a PC at home was a luxury for most. If there are two PCs in the room, then the user asks this question. Thus, the PC provides the ability to directly connect to a home local line and connect two or more PCs via an appropriate network. More on this later.
How to create a local network between two computers? — Connecting two or several PCs to each other
Before constructing a local line, decide how it will be constructed. Such a network usually consists of two or more computers. There are two construction options here:
- Connecting computers directly with a special cable.
- Using a router.
Direct method

This simplest option, which does not require special equipment costs. This method connects 2 or 3 PCs. Interestingly, if one of the PCs has the ability to access the Internet, other PCs on the same network can also connect to it.
What is required to create a connection?
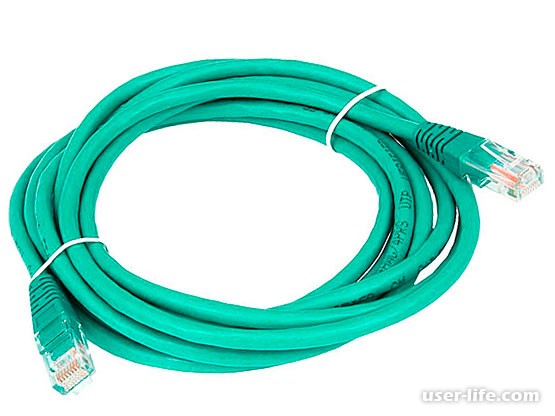
- A twisted pair cable is not much longer than the distance between computers. A better option would be to buy a crimped cable (it already has a connector for connecting to a PC network card).
- Every computer must have a network card. All PCs of our time have it.
There is no need for special expenses.
Now connect the PC system units to each other and turn it on.
Advantages:
- cheapness;
— speed;
— ease of setup;
— reliability;
— fast file exchange.
Flaws:
- excess wires;
— to access the Internet, the main PC must be working;
— no network access for mobile devices.
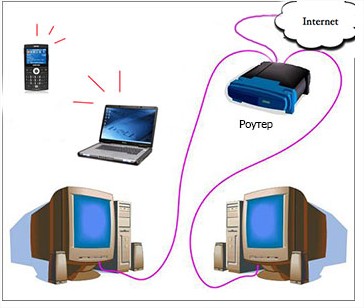
Creation using a router
Thanks to the router, you will create a network and connect to home internet from all devices.
Set up your device just once, and you can access the Internet from all devices. Stores provide a huge selection of different devices.
To connect a PC to the router, it is enough to have special cable, usually provided with the router. Laptops and all kinds of cellular devices can be connected via Wi-Fo.
Advantages:
— one-time setup is enough;
— providing access to the network from absolutely all devices;
— no excess wires;
— flexibility of installations.
Flaws:
- more costs;
— high-quality speed is not always provided.
Setting up a local line in Windows 7 and 8
After connecting to the network, you need specific setting systems. Everything related to the seven will be considered here. For version 8, the settings are similar.
When using a router
Here the local line is usually configured mechanically. Here you need to configure the router. Each router model has its own configuration features, so here you need to rely on the instructions specific to a particular model.
After manipulating the router interface, you can now configure the system.
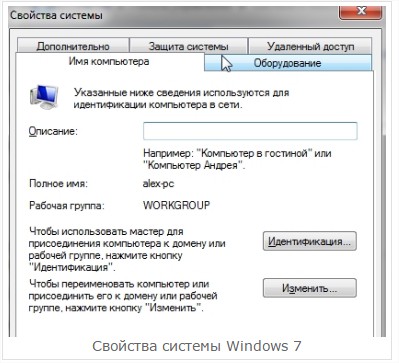
Workgroup and PC name
First set the preferred name for your PC, and then set the same name for the entire local group.
For all this you will need the “System” section in the “Control Panel”.

Now on the left side click “Advanced system settings”.
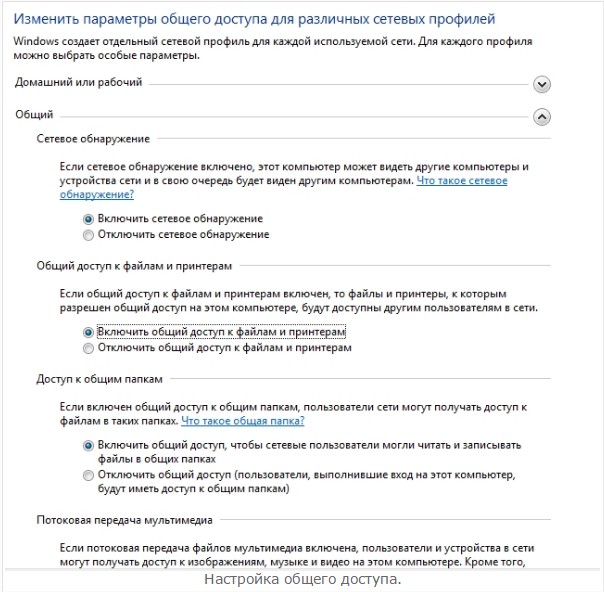
Public availability
It is necessary to provide access to folders and files from any PC in the group.
Go to “Network and Internet”.

Go to Network and Sharing Center.

Select "Change advanced sharing settings."

You will see 2 or more profiles. Allow access in all profiles and disable password protection.
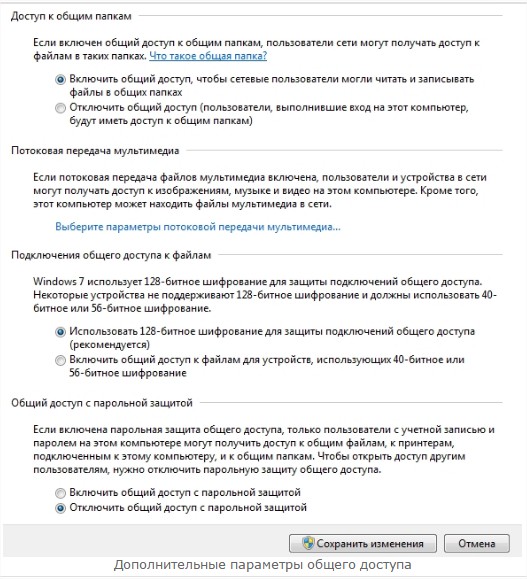
Save and restart the system.
Sharing folders
To see the files on the second PC, expand the folders.
Open File Explorer and right-click on the desired folder. Say "Sharing - HomeGroup".

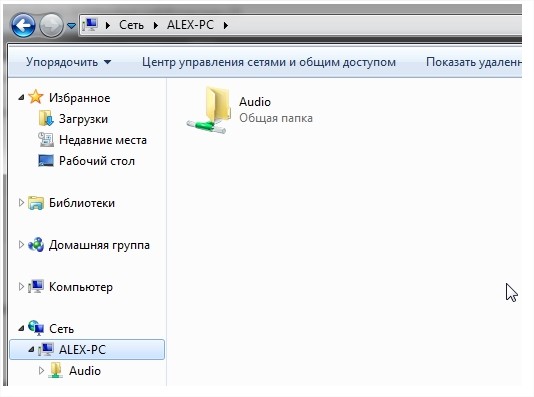
Now wait 15 seconds and access to the folder will be provided. To see all PCs, click “Network” on the left.
Directly
In most cases the procedure is similar to that described above. In the same way, as described above, the PC name and general working group, as well as sharing. But here you still need to configure IP addresses and gateways.
Settings are done in different ways.
Here we assume a host PC connected directly to the global network. Find " Network connections" Enable "Connect via local network"or an item with a similar name.

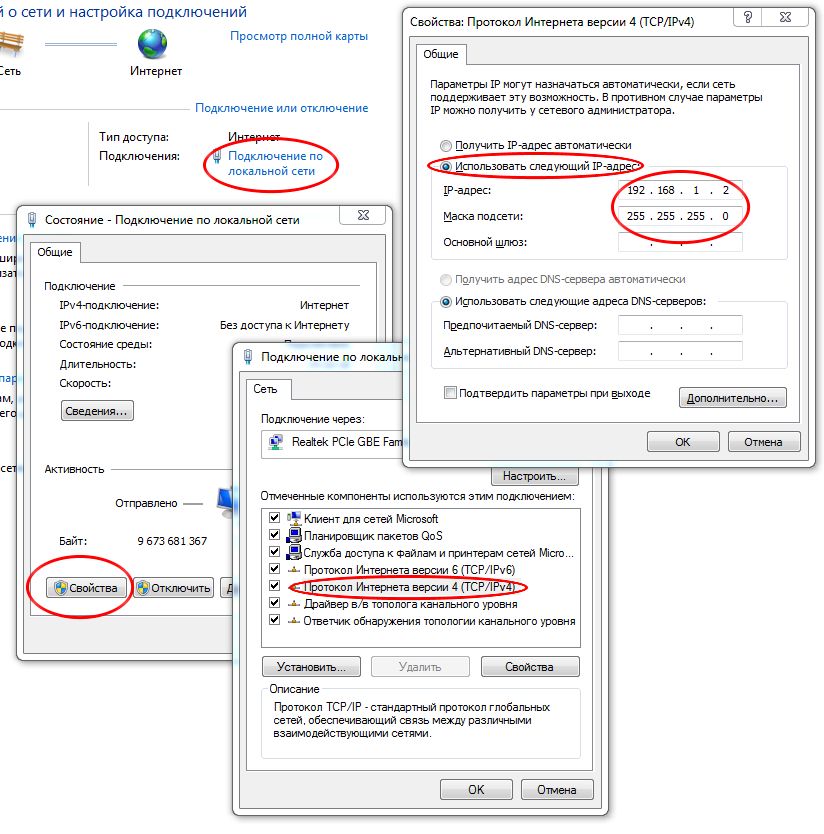
Go to properties and look for “Internet Protocol Version”. Its properties should be revealed.

Fill it out like this:
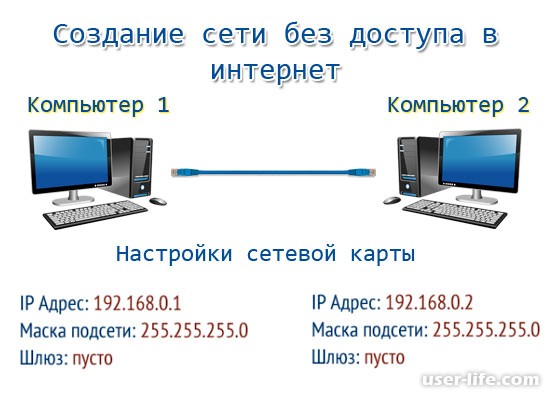
ip - 192.168.0.1,
subnet mask is 255.255.255.0.
In the Network Connections section, set the following:
ip - 192.168.0.2,
subnet mask is the same
gateway -192.168.0.1
DNS - 192.168.0.1..

Sharing for PC2
On the first PC, open “Network connections”, and then their properties.
Allow other PCs to use the network.
Conclusion
So you have learned how to create a local network between two computers. In this way, a local network is organized and configured to provide access to it by two or more PCs at the same time. This is quite convenient to use when there is more than one computer in your home, office, or anywhere else. Thank you all for your attention, good luck to everyone!
How to create a local network between two computers?
This article will come in handy if your apartment has not one, but two computers. Sometimes documents need to be transferred between them, and children can play games online. Today we will talk about how to connect two computers to each other.
One of the most simple ways– use of the so-called twisted pair cable. The cost of the work cannot be cheaper, but the data transfer speed is much higher than in other cases. It makes sense to lay a cable if the distance between PCs is less than 100 meters.
We will need:
- Network card in every computer. Attention! They may already be installed on your computer (check), otherwise you need to buy them.
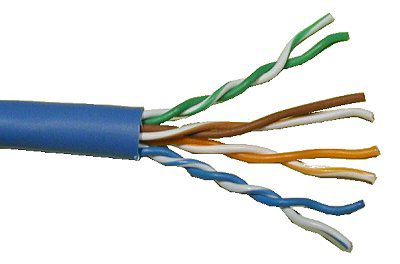
- Twisted pair – copper wires twisted in pairs in insulation. There are shielded (STP) and unshielded (UTP). UTP is suitable for our needs, and it’s easier to buy such a pair.
 3.RJ-45 plugs (also called “jack”), 2 pcs. It is possible that similar ones are used in your telephone socket.
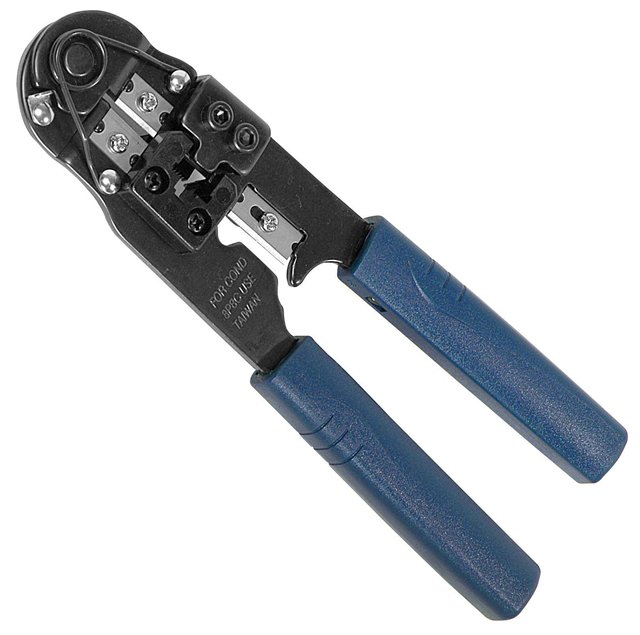
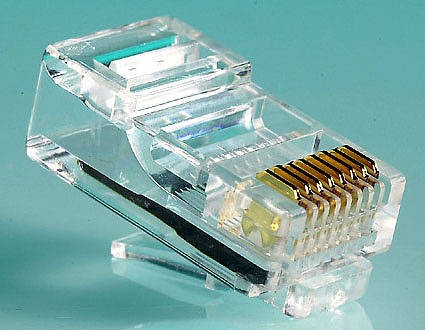 4. Crimping tool (called a “crimper”).
What's the first step? We measure the distance between computers along the route of future cable laying. Then we go to the store and buy the same amount of twisted pair, as well as a few meters in reserve. We also take forks and crimping tools there.
The purchased cable must be crimped using the Cross-over type. This option is used when connecting computers without using a hub or similar devices. This is done like this:
- From both ends of the purchased cable we cut off the sheath by approximately 3 centimeters.
- We unravel the wires inside and place them according to the picture.
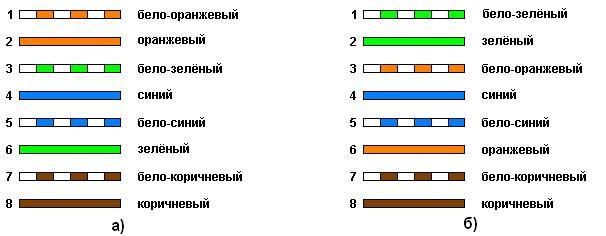
- In this order, we insert the twisted pair conductors into the RJ-45 plugs. Important! The order of colors is not the same for different forks.
- We take a crimping tool, insert the forks into it one at a time and squeeze the crimper handles until they stop.
There are only simple steps– setting up the operating system. Let's show all the steps using Windows 7 as an example:
- We connect the jacks to the connectors of the network cards (usually located on the back wall of the system units; you won’t confuse them with anything else, since the plugs cannot be inserted into other connectors).
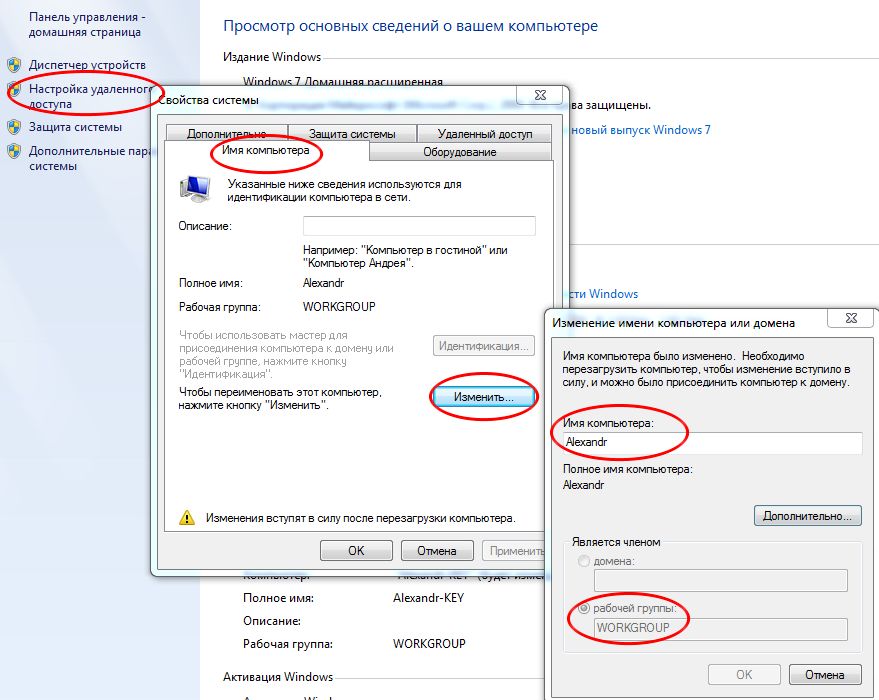
- Open the Control Panel, select the System item, and in it you will need Settings remote access– Computer name tab – Edit. We give a name to the computer and the group of devices in which it will work. The system will prompt you to reboot, but we’ll refuse it for now.
- We again need the Control Panel, and there we need the Network and Sharing Center. Find the Local Area Connection item, click Properties - Internet Protocol Version 4 (here we double-click) - Use the following IP address. Enter the IP address 192.168.1.2 and the subnet mask 255.255.255.0.
- Reboot the computer
- We perform the same actions with the second computer. Important! The computer name must be different; only the last digit in the IP address must be different. The workgroup names and subnet mask are the same as the first device.
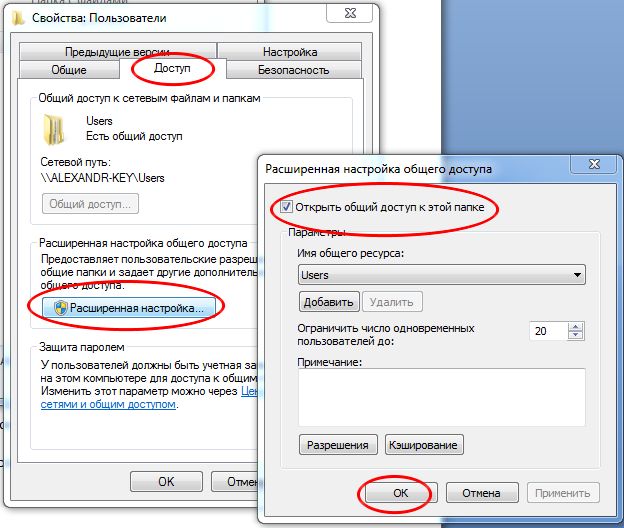
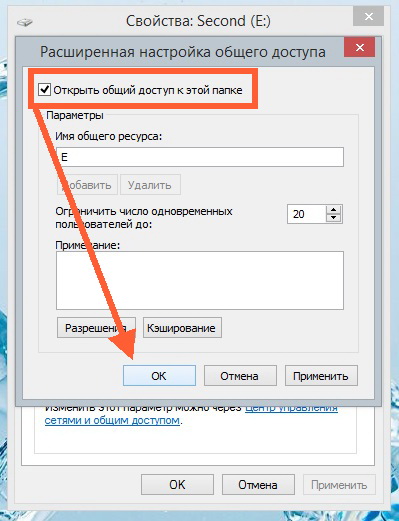
- To use files from one computer on another, you need to specifically allow this. To do this, click on the required folder right click mouse and select the section “Sharing – Access tab – Advanced sharing settings”. Check the box “Open general access to this folder."
That's all. You learned how to connect two computers together into one network.
Did you like the material?
Share:
Please rate:
It often happens that there are two computers in the house and it is necessary to frequently exchange a large amount of information between them. If such exchange occurs rarely with a small number of files, then it is logical to use a flash drive. Otherwise, it is better to create a home network. It allows you to exchange data between devices within this network at high speed. Let's figure out how a home network is convenient.
Using a flash drive is not entirely convenient: files are copied slowly, and due to memory limitations, you will have to constantly erase and upload new files, which takes a lot of time. Let's consider combining two computers through a homegroup. For this purpose, you must have a router installed in your home to which both computers are connected using network cable or WI-FI connection. To connect two devices to share information, you need to create a homegroup on one of the devices. The computer on which it was created is the main computer of the network. Another device that is a child of the master simply needs to be connected to this group.
What actions must be taken in order to make a connection:
- On the right side of the desktop taskbar, where the system icons are located, find the monitor image, right-click on it and select “Network Center”.
- In the resulting window, select the item "Home Group". In a new window
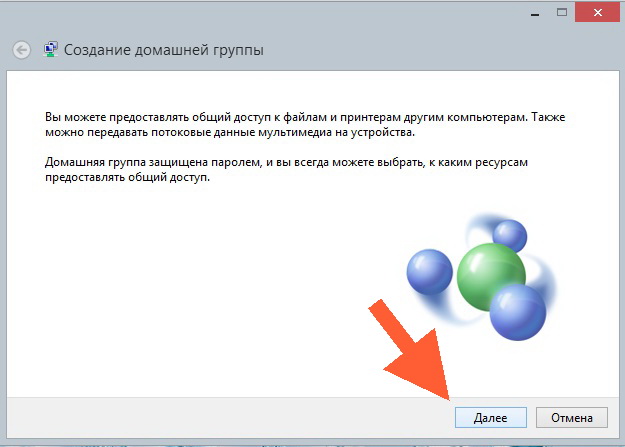
Click on the “Create a home group” button and in the section that appears, click “Next”.
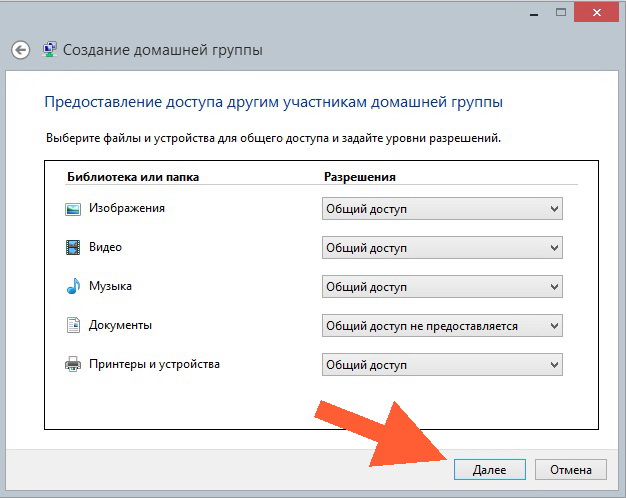
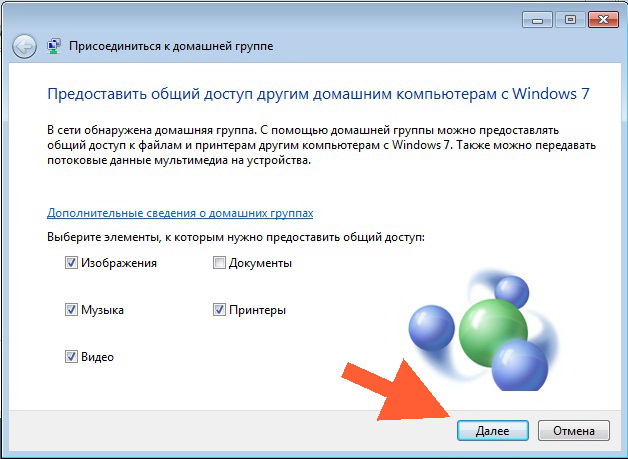
- Now you must choose which folders will be open to other network devices. When everything is ready, click “next”.
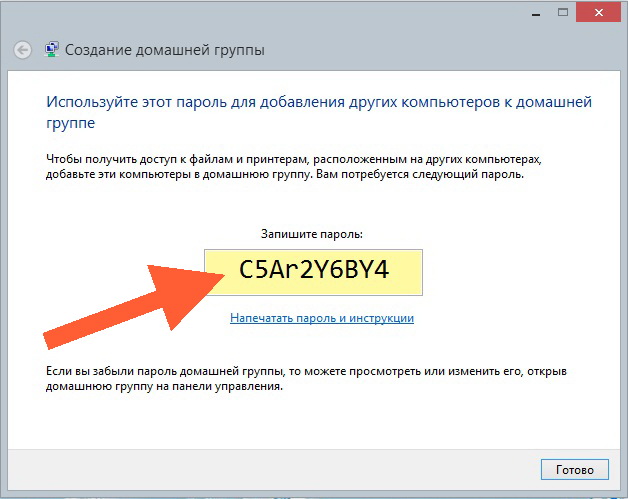
- The next window will ask us to come up with a password for accessing the group and write it down in the appropriate text field. Thus, use home network only those who know the password can do so, and no one else can connect to it. In case you forget your password, it is better to write it down on a piece of paper.
- Finally, click the “finish” button, which ends the procedure.
Home network, step-by-step setup in pictures


Home network of computers. Completion
Now, knowing the password, you can connect to the group from any device on the network.
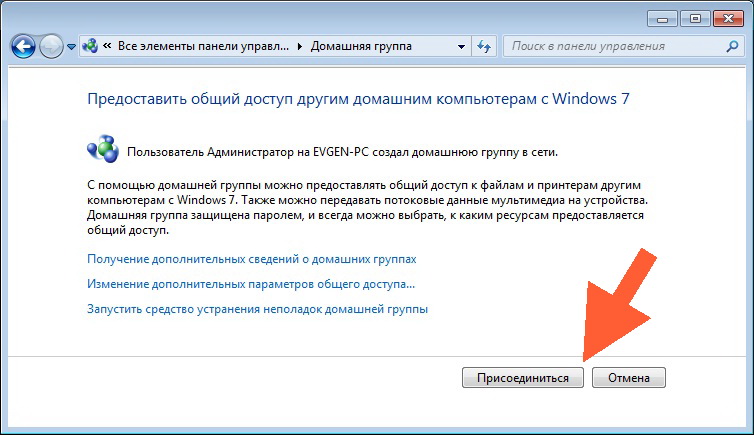
What you need to do to connect to the host computer:
- Open the “Network and Sharing Center”, after which a window with a “Join” button will appear.
- Next, you should select those resources that you are ready to provide access to the host computer.
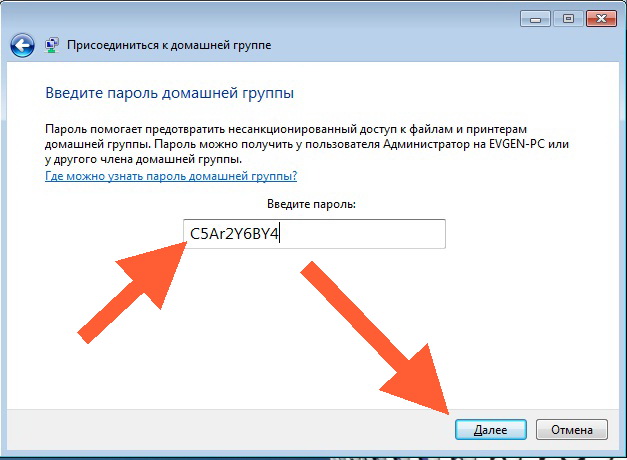
- In the next window we print the password that was written down when creating home group, and click “next”. That's it, the connection is established. Now you need to configure shared access to folders and drives:
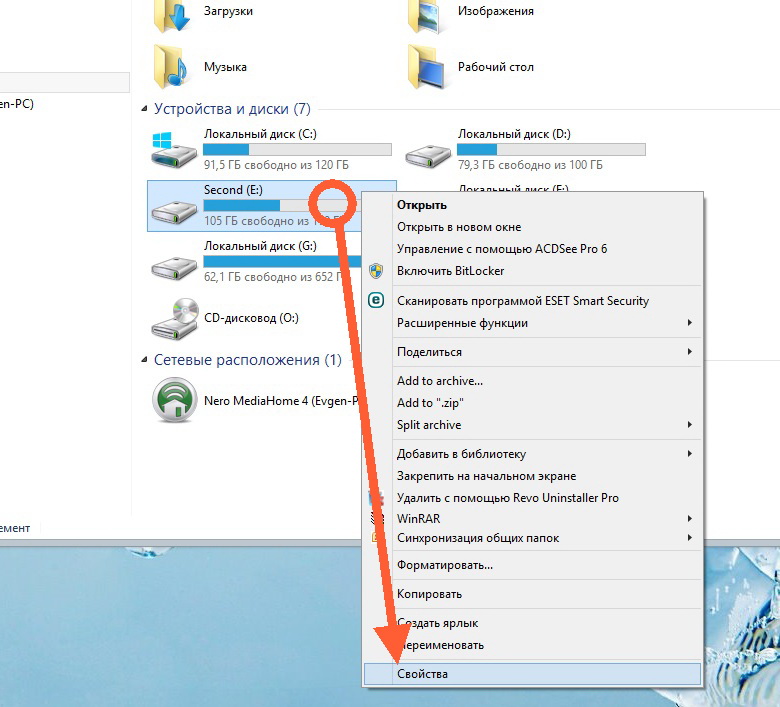
- Select the desired folder or drive, right-click on the folder, drive, or file, and select the “properties” section.
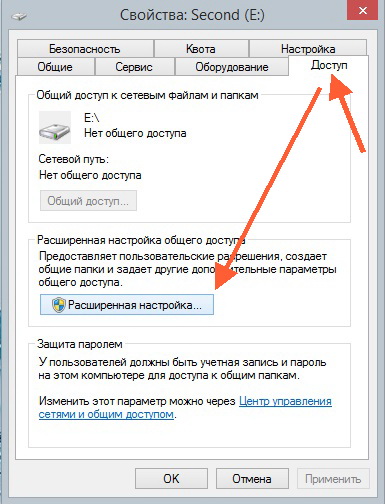
- In the new window, select “access” and click on the “Advanced settings” section.
- In the settings, check the “share this folder” option and click “ok”. Now the disk is available to the group and you can use it different operations: copying files and folders, browsing, and so on.
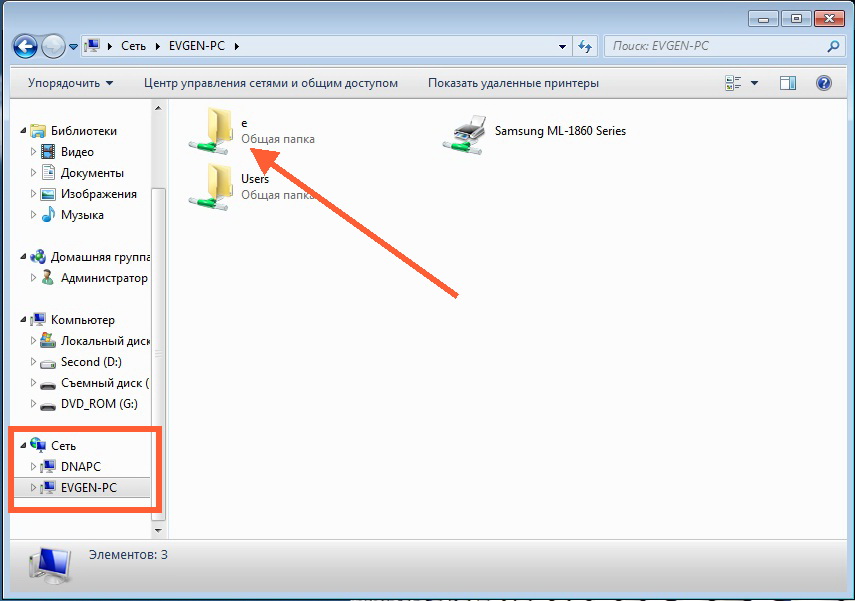
Now, in order to work with folders and files on the main computer, you need to open the network on the child computer and find folders that are allowed access on the main computer. These files can be copied to a child computer, from a child computer to the main one, and other things that are provided operating system. There may be a situation where there is no connection when correct settings. The reason may be an antivirus that does not allow connection to other computers. In order to open a connection, you must disable the antivirus while working in the homegroup.
Sometimes there is a need connect two computers over a network, but network equipment is not always available. What to do if you don’t have a switch, router or modem? There is only one way out - to connect two computers with one cable. Today we will look at two situations: when two computers have one network card each and when one of them has two network cards.
In the first case, it will be possible to configure only a network between two computers. In the second case, both the network and the Internet will work on two PCs. Let's figure out what is needed to make two computers “become friends”:
1. Actually, two working computers with network cards,
2. Cable for direct connection of computers,
3. Smooth hands (2 pcs).
The cable can be purchased ready-made at any store. computer equipment, you just need to clarify that it is needed for the “Computer” - “Computer” connection (cross cable). If you want, you can crimp the cable yourself. I have already described in detail how to crimp a crossover cable in the article. In short, the crimping diagram looks like this:
Here is an example of a finished cable:
When you have all the components ready, you can proceed to your plan.
We connect two computers that have one network card each
When purchasing a computer or system unit in most cases you can see only one network card (it is built into motherboard). In this case, consider two similar computers that each have only one network card. Below you can see the connection diagram:
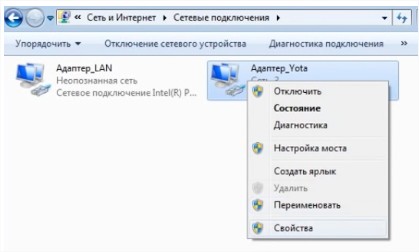
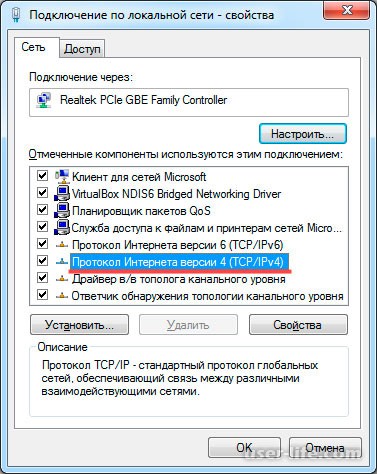
When the cable is connected in two PCs, we set up the network. Right-click on the Network icon on the Taskbar and select "Network and Sharing Center."
![]()
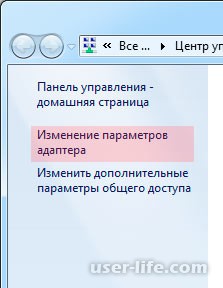
A window will open where everyone will be visible network adapters(I have two of them: one is physical, the second is virtual from VirtualBox). Click double click left mouse button on the physical adapter (Local Area Connection).

The Network Properties window will open, where we have to select “Internet Protocol version 4 TCP/IPv4” by double-clicking LMB,
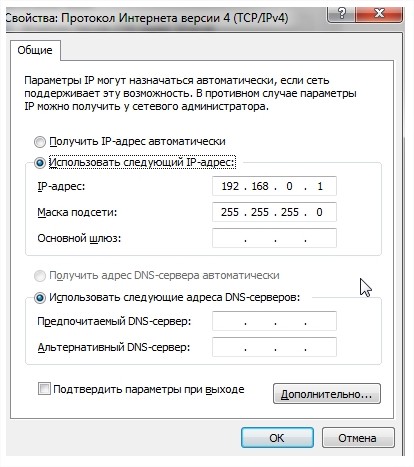
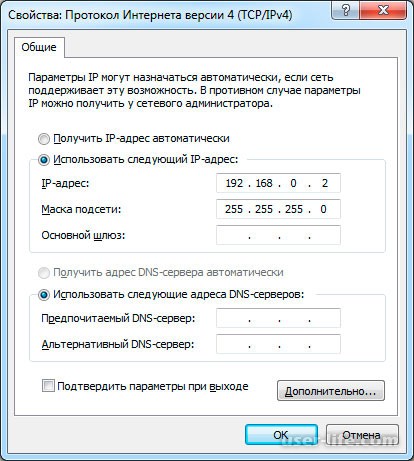
After that, in the TCP/IPv4 protocol properties window we indicate the parameters of our network. Enter the data as shown on the screen below,

Note that the Default Gateway must be empty, as well as the Preferred and Alternate DNS servers. After the data has been entered, click OK and OK again.
We make the same settings on the second computer, with the exception of the IP address. It should look like this 192.168.0.2,
After all the manipulations described above, the two computers will work on the same network. To check the functionality, we will ping one and the second PC. To do this, open the command line on the first computer (Win + R and enter the command “cmd”) and enter:
ping 192.168.0.2
The packet exchange should be successful, as in the screenshot:

Now do the same steps on the second computer, entering ping 192.168.0.1
V command line. If you received a report about the successful exchange of packets, then congratulations - the network between the two computers is configured. If the ping does not work, then most likely you made a mistake somewhere. Check everything again more carefully. By the way, access to the computer may be blocked Windows Firewall or an antivirus, so if you can’t configure the network, try disabling these two utilities.
(banner_ssilki_tekst)